
Key takeaways
- Excel lets users convert spreadsheets to PDF through Save As, Export, or Print to PDF.
- Save As is the fastest option, while Print to PDF gives more control over scaling and layout.
- Jotform is a better alternative for users looking for more polished, repeatable PDF workflows.
Converting an Excel spreadsheet to PDF is straightforward: a few clicks, and the file is ready to share or print. The trickier part is making sure it actually looks right when someone opens it. Columns might spill onto extra pages, text can become too small to read, and awkward page breaks can turn a simple export into a time-sapping formatting headache.
Excel offers three native ways to convert a spreadsheet to PDF: Save As, Export, and Print to PDF. Each option works well in different situations, and this guide walks through all three so you can pick the right one for the job.
If you regularly need polished, professional PDFs with consistent layouts, branding, or form-based data collection, there’s a simpler workflow worth considering: Jotform. In this article, I cover Excel’s built-in PDF tools in depth, complete with screenshots and step-by-step instructions. But if you’re looking for a simpler way to create and manage PDF documents, Jotform can help you spend less time fighting with spreadsheet settings (and your morale!) every time you want a PDF of your data.
4 ways to convert Excel to PDF fast
Excel has three built-in ways to convert Excel spreadsheets to PDF, and each one suits a slightly different situation:
- Save As: This is the fastest route if you just need to convert a file quickly. It gets the job done in seconds.
- Print to PDF: This option gives you more control over layout, which is ideal if the file needs to look just right before it goes out.
- Export: This built-in alternative available from Excel’s File menu follows a slightly different workflow that some users find more intuitive.
If you don’t have Excel installed, you can use Convert PDF software as a fallback.
Pro Tip
Fix the layout before you export. If your Excel PDF looks wrong, the problem is usually the layout, not the conversion itself. Before exporting, set the print area, adjust the orientation and margins, scale the sheet carefully, and use Print Preview to catch cut-off columns, awkward page breaks, tiny text, or messy formatting.
Here are four workflows, including screenshots, for saving an Excel file as a PDF:
1. Save Excel as a PDF (fastest method)
Save As is the quickest route from spreadsheet to PDF.
There’s no extra menu to navigate; you just change the file format and save.
- Open your spreadsheet in Excel.
- Click File in the menu bar at the top of your screen. From the dropdown, click on Save As.
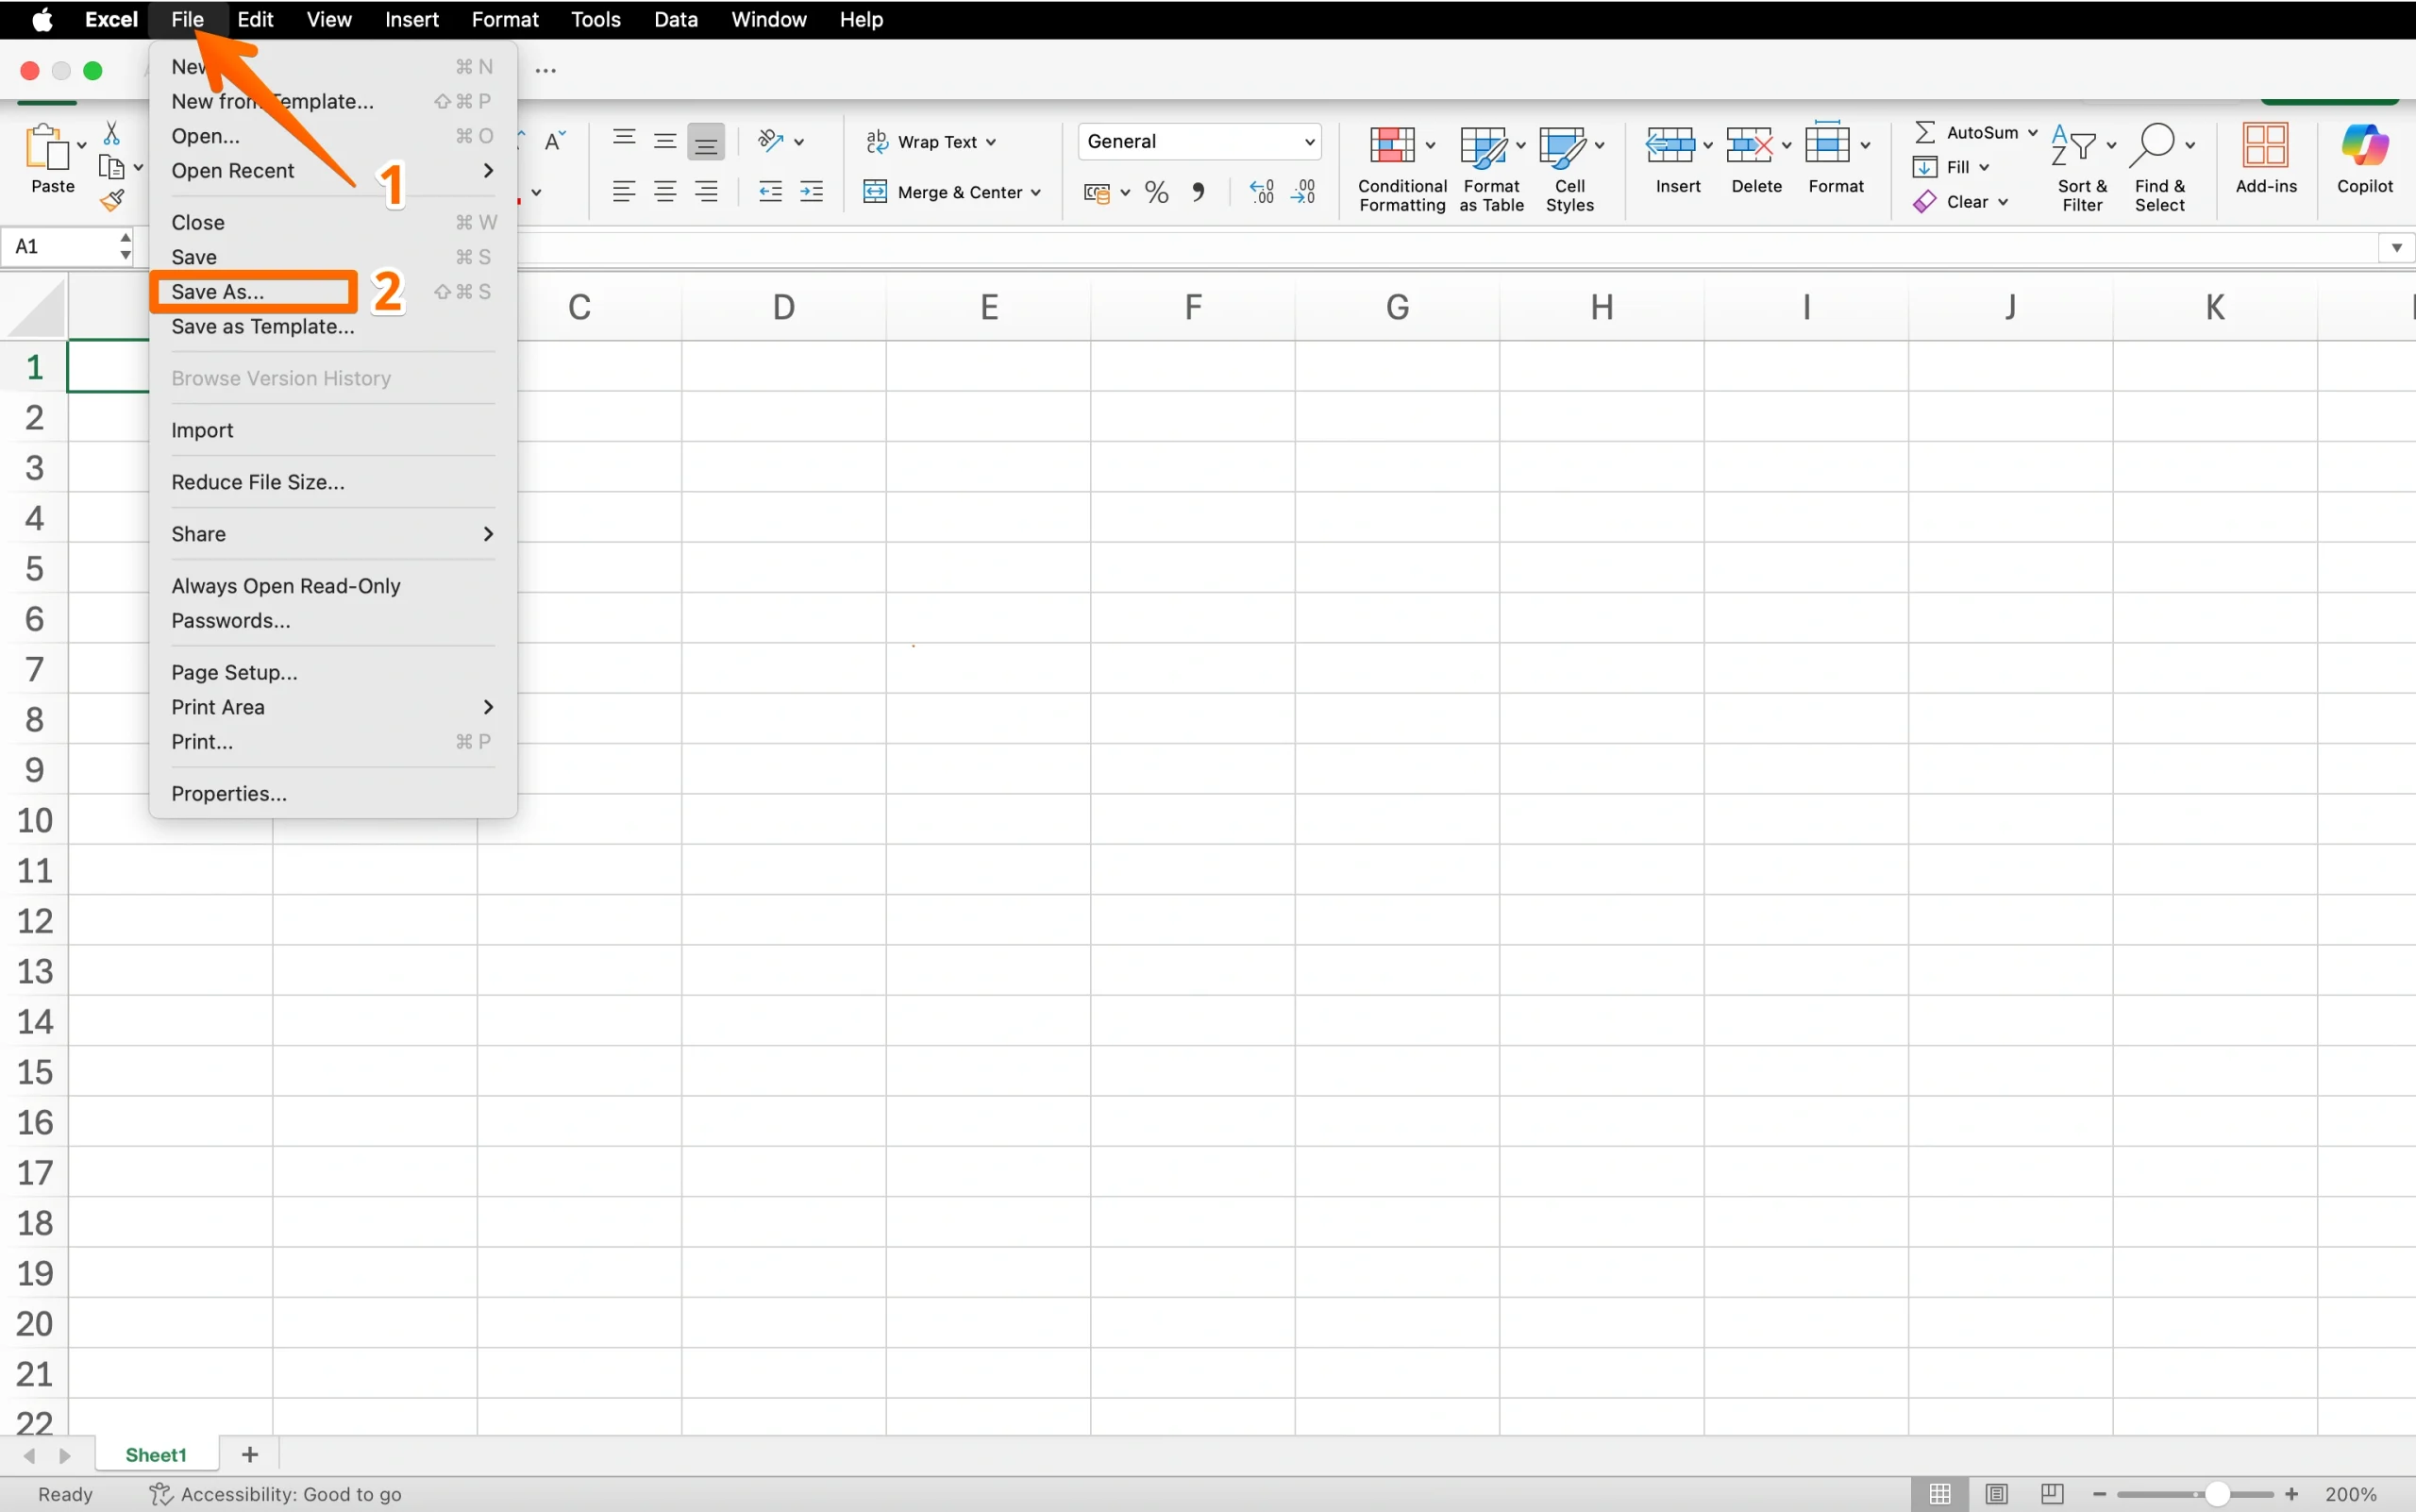
- Choose where to save the file using the option on the left (as seen in the following screenshot).
- In the file format dropdown, select PDF (*.pdf).
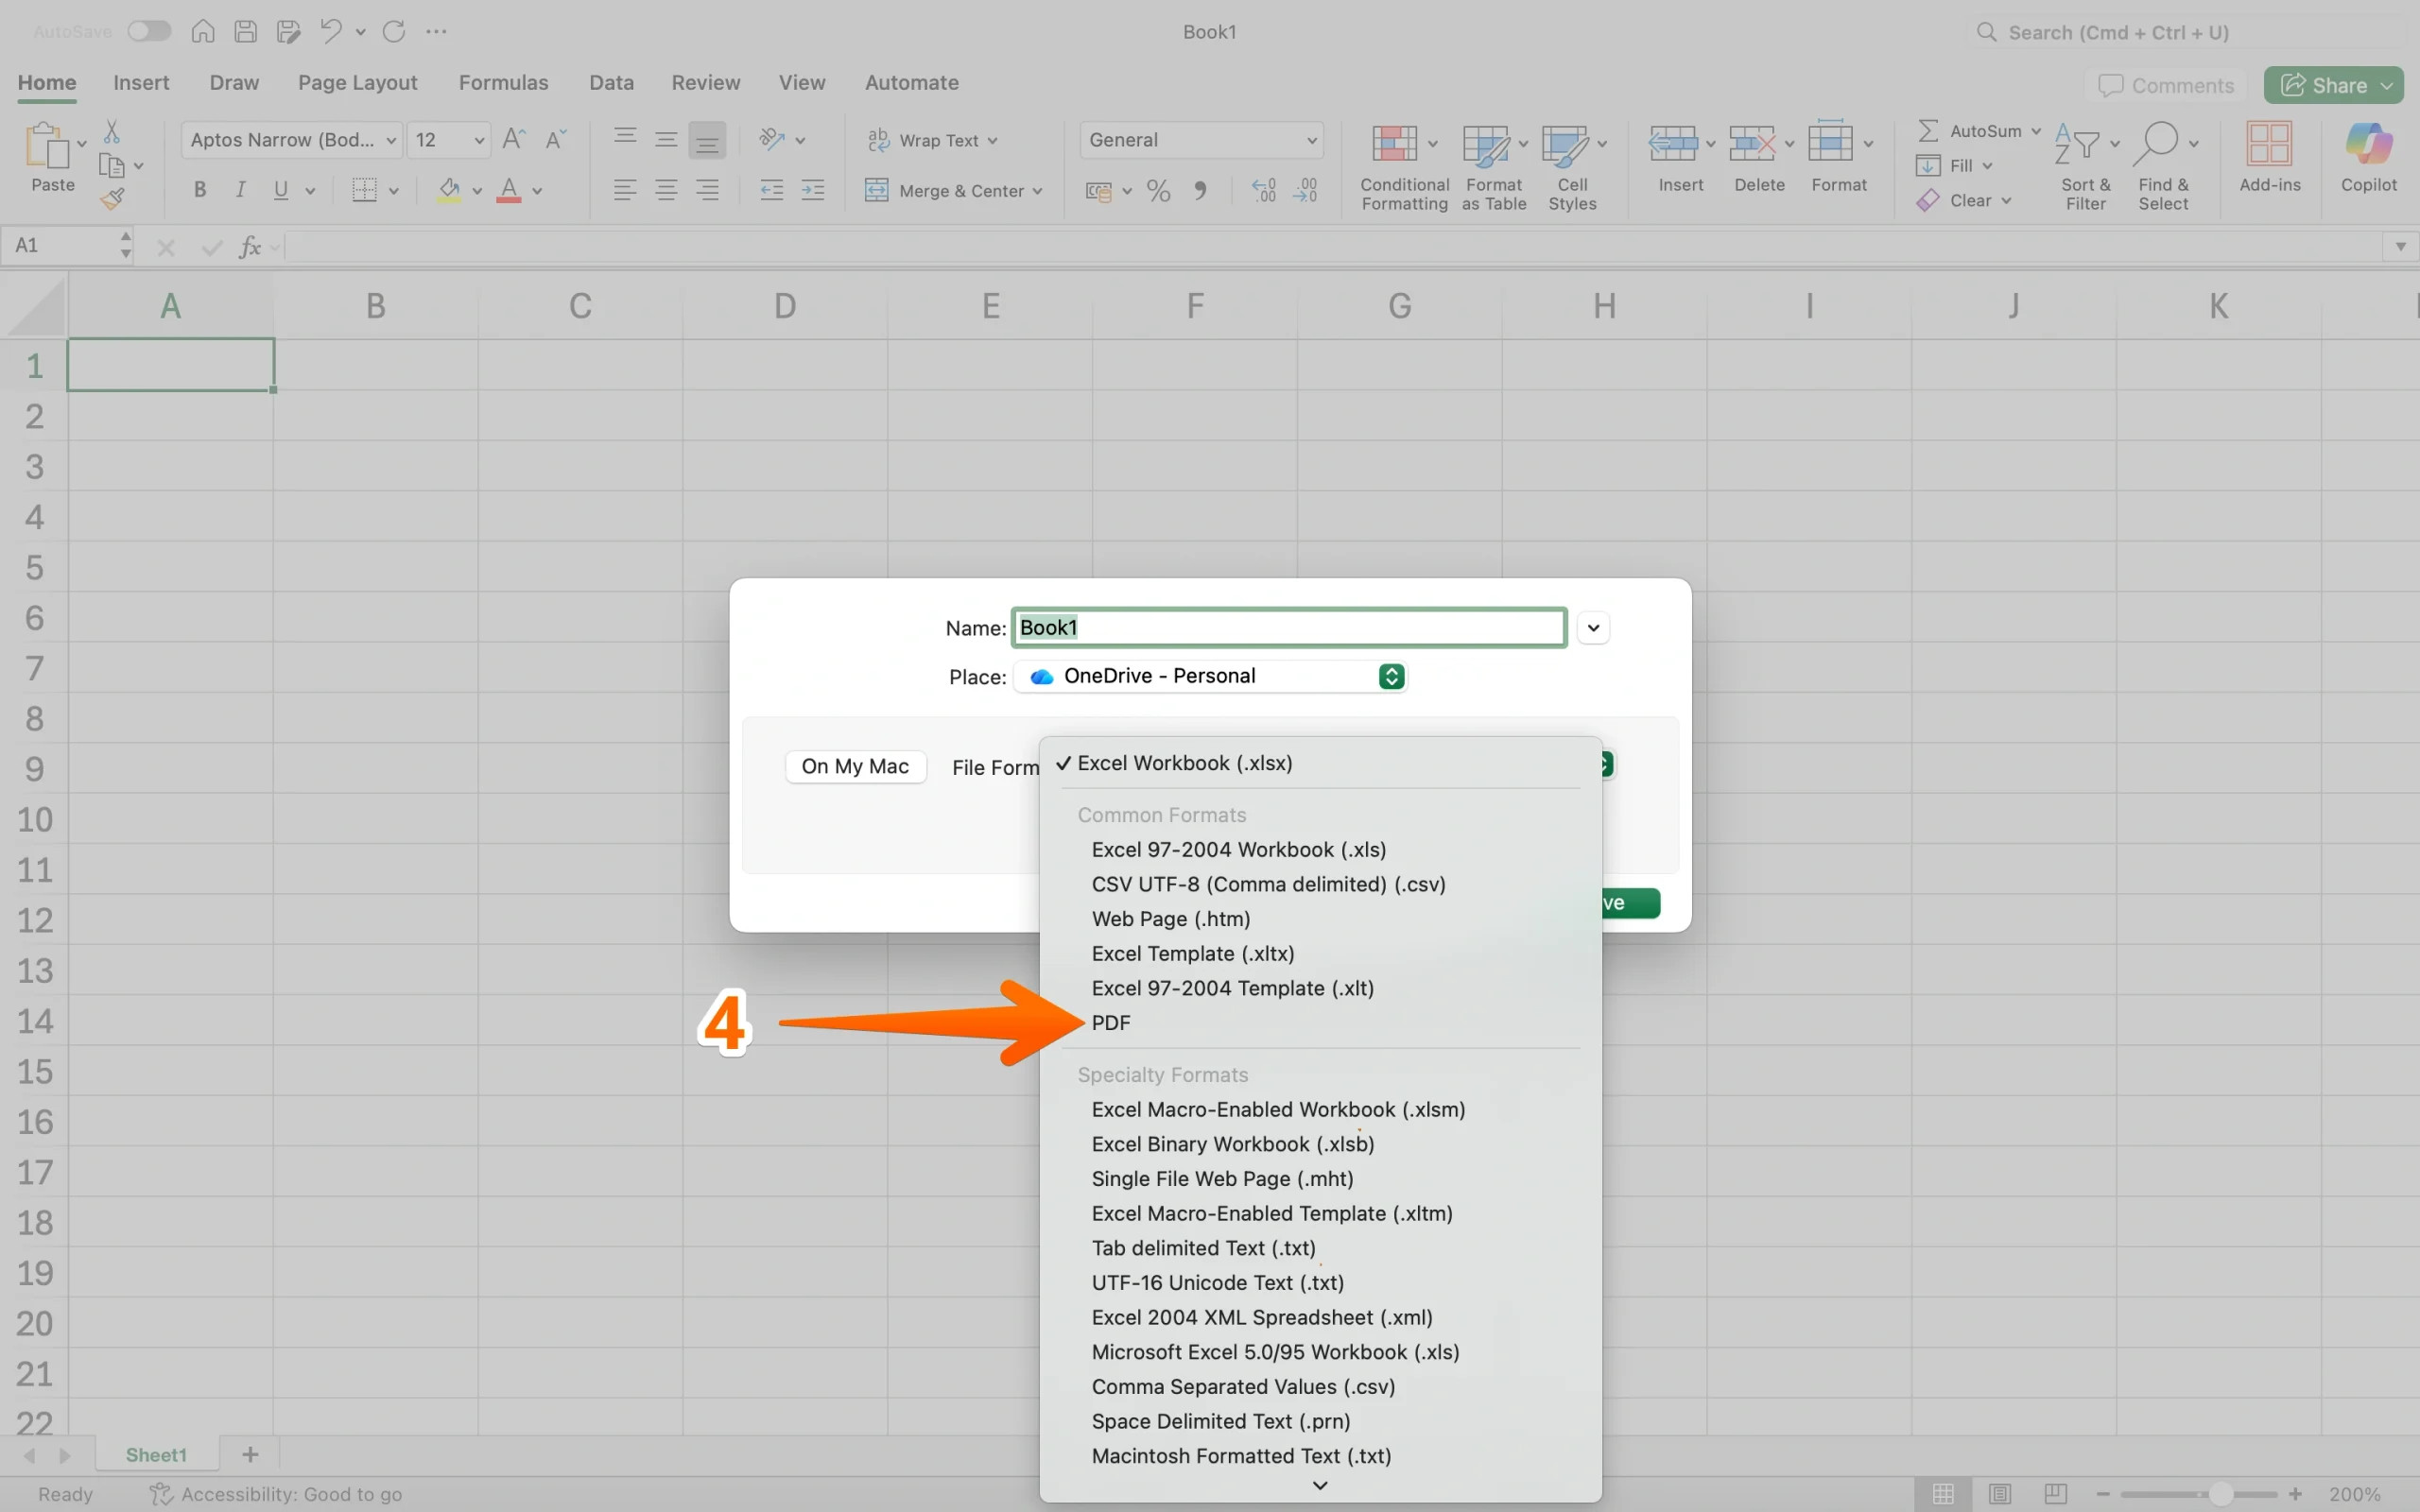
- Click Save.
That’s it.
Excel converts the active sheet and saves it as a PDF in the location you chose. If the document is already formatted correctly with PDF export in mind, you won’t need to make any additional changes.
If you need to format the document, the next option might be better.
2. Print Excel to PDF (best for more layout control)
If you need to control how the spreadsheet fits on the page by doing things such as scaling the document to fit a certain page size, adjusting margins or orientation, or inserting page breaks, Print to PDF is the better option.
You get a full preview before anything is saved.
- Open your spreadsheet in Excel.
- Click File within the main menu and look for Print.
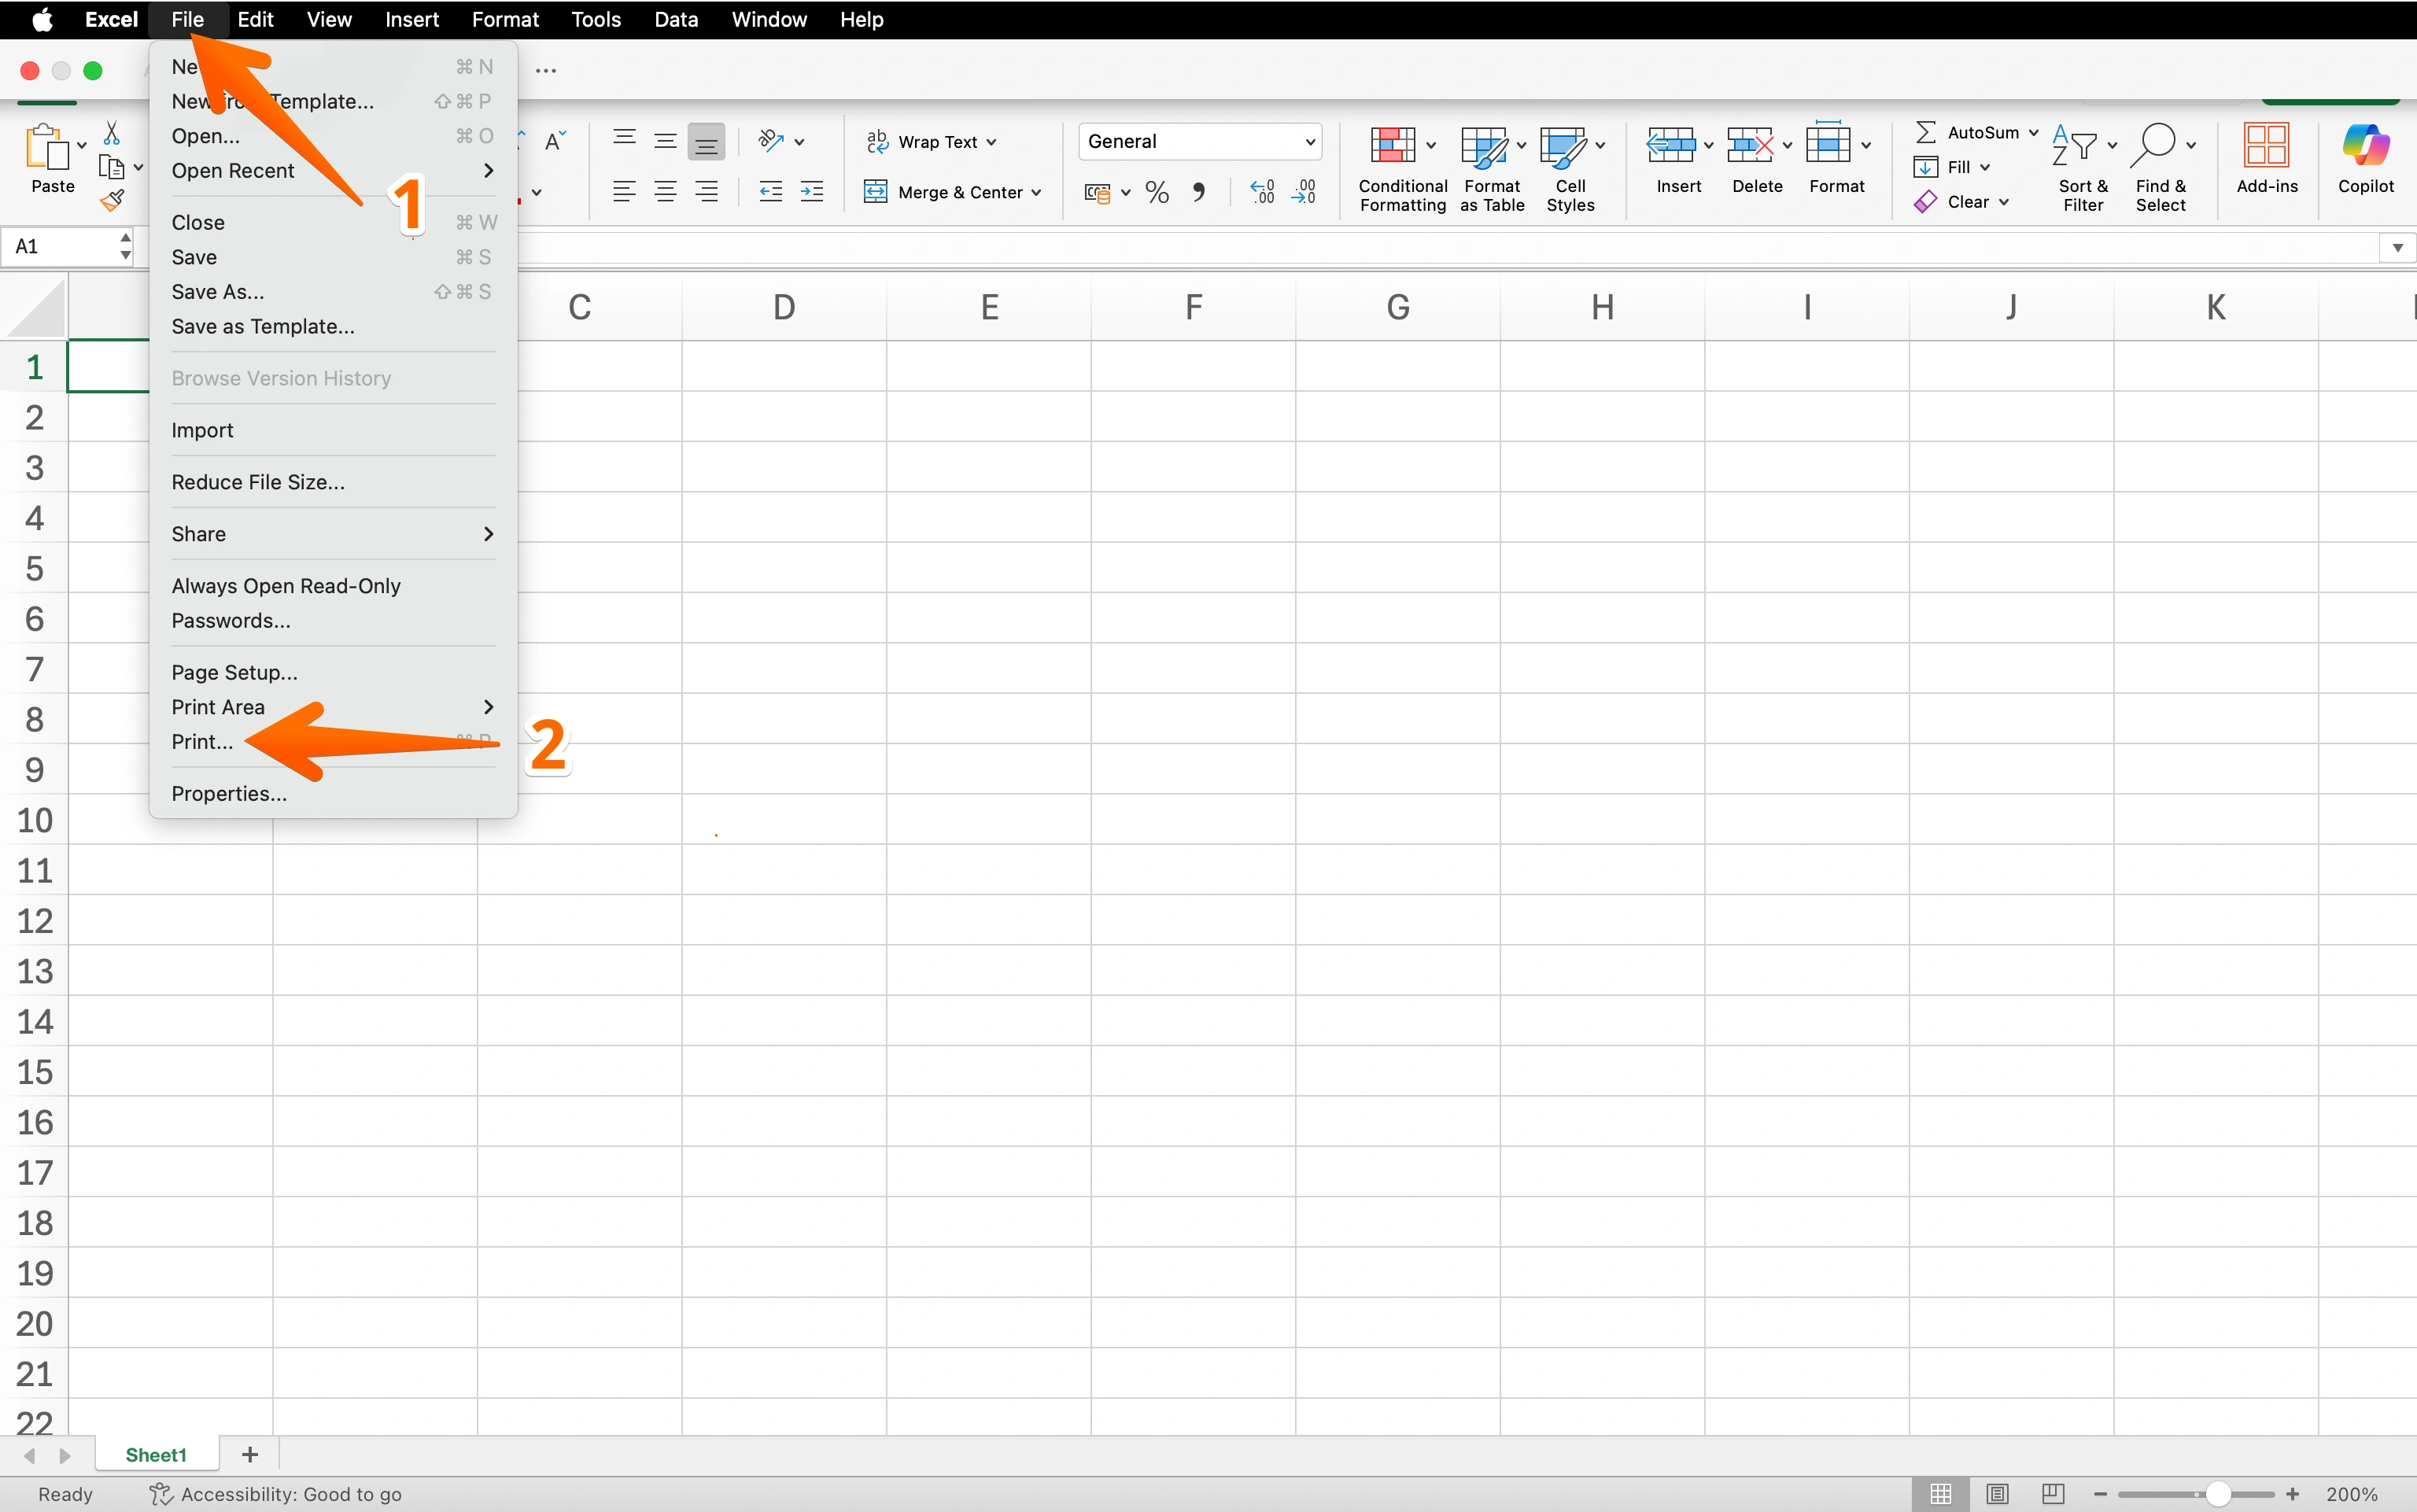
Tip: Skip step one and press Ctrl+P on Windows or Cmd+P on Mac to open the Print dialog from step two instantly.
- In the Printer dropdown, select Microsoft Print to PDF (Windows) or Save as PDF (Mac).
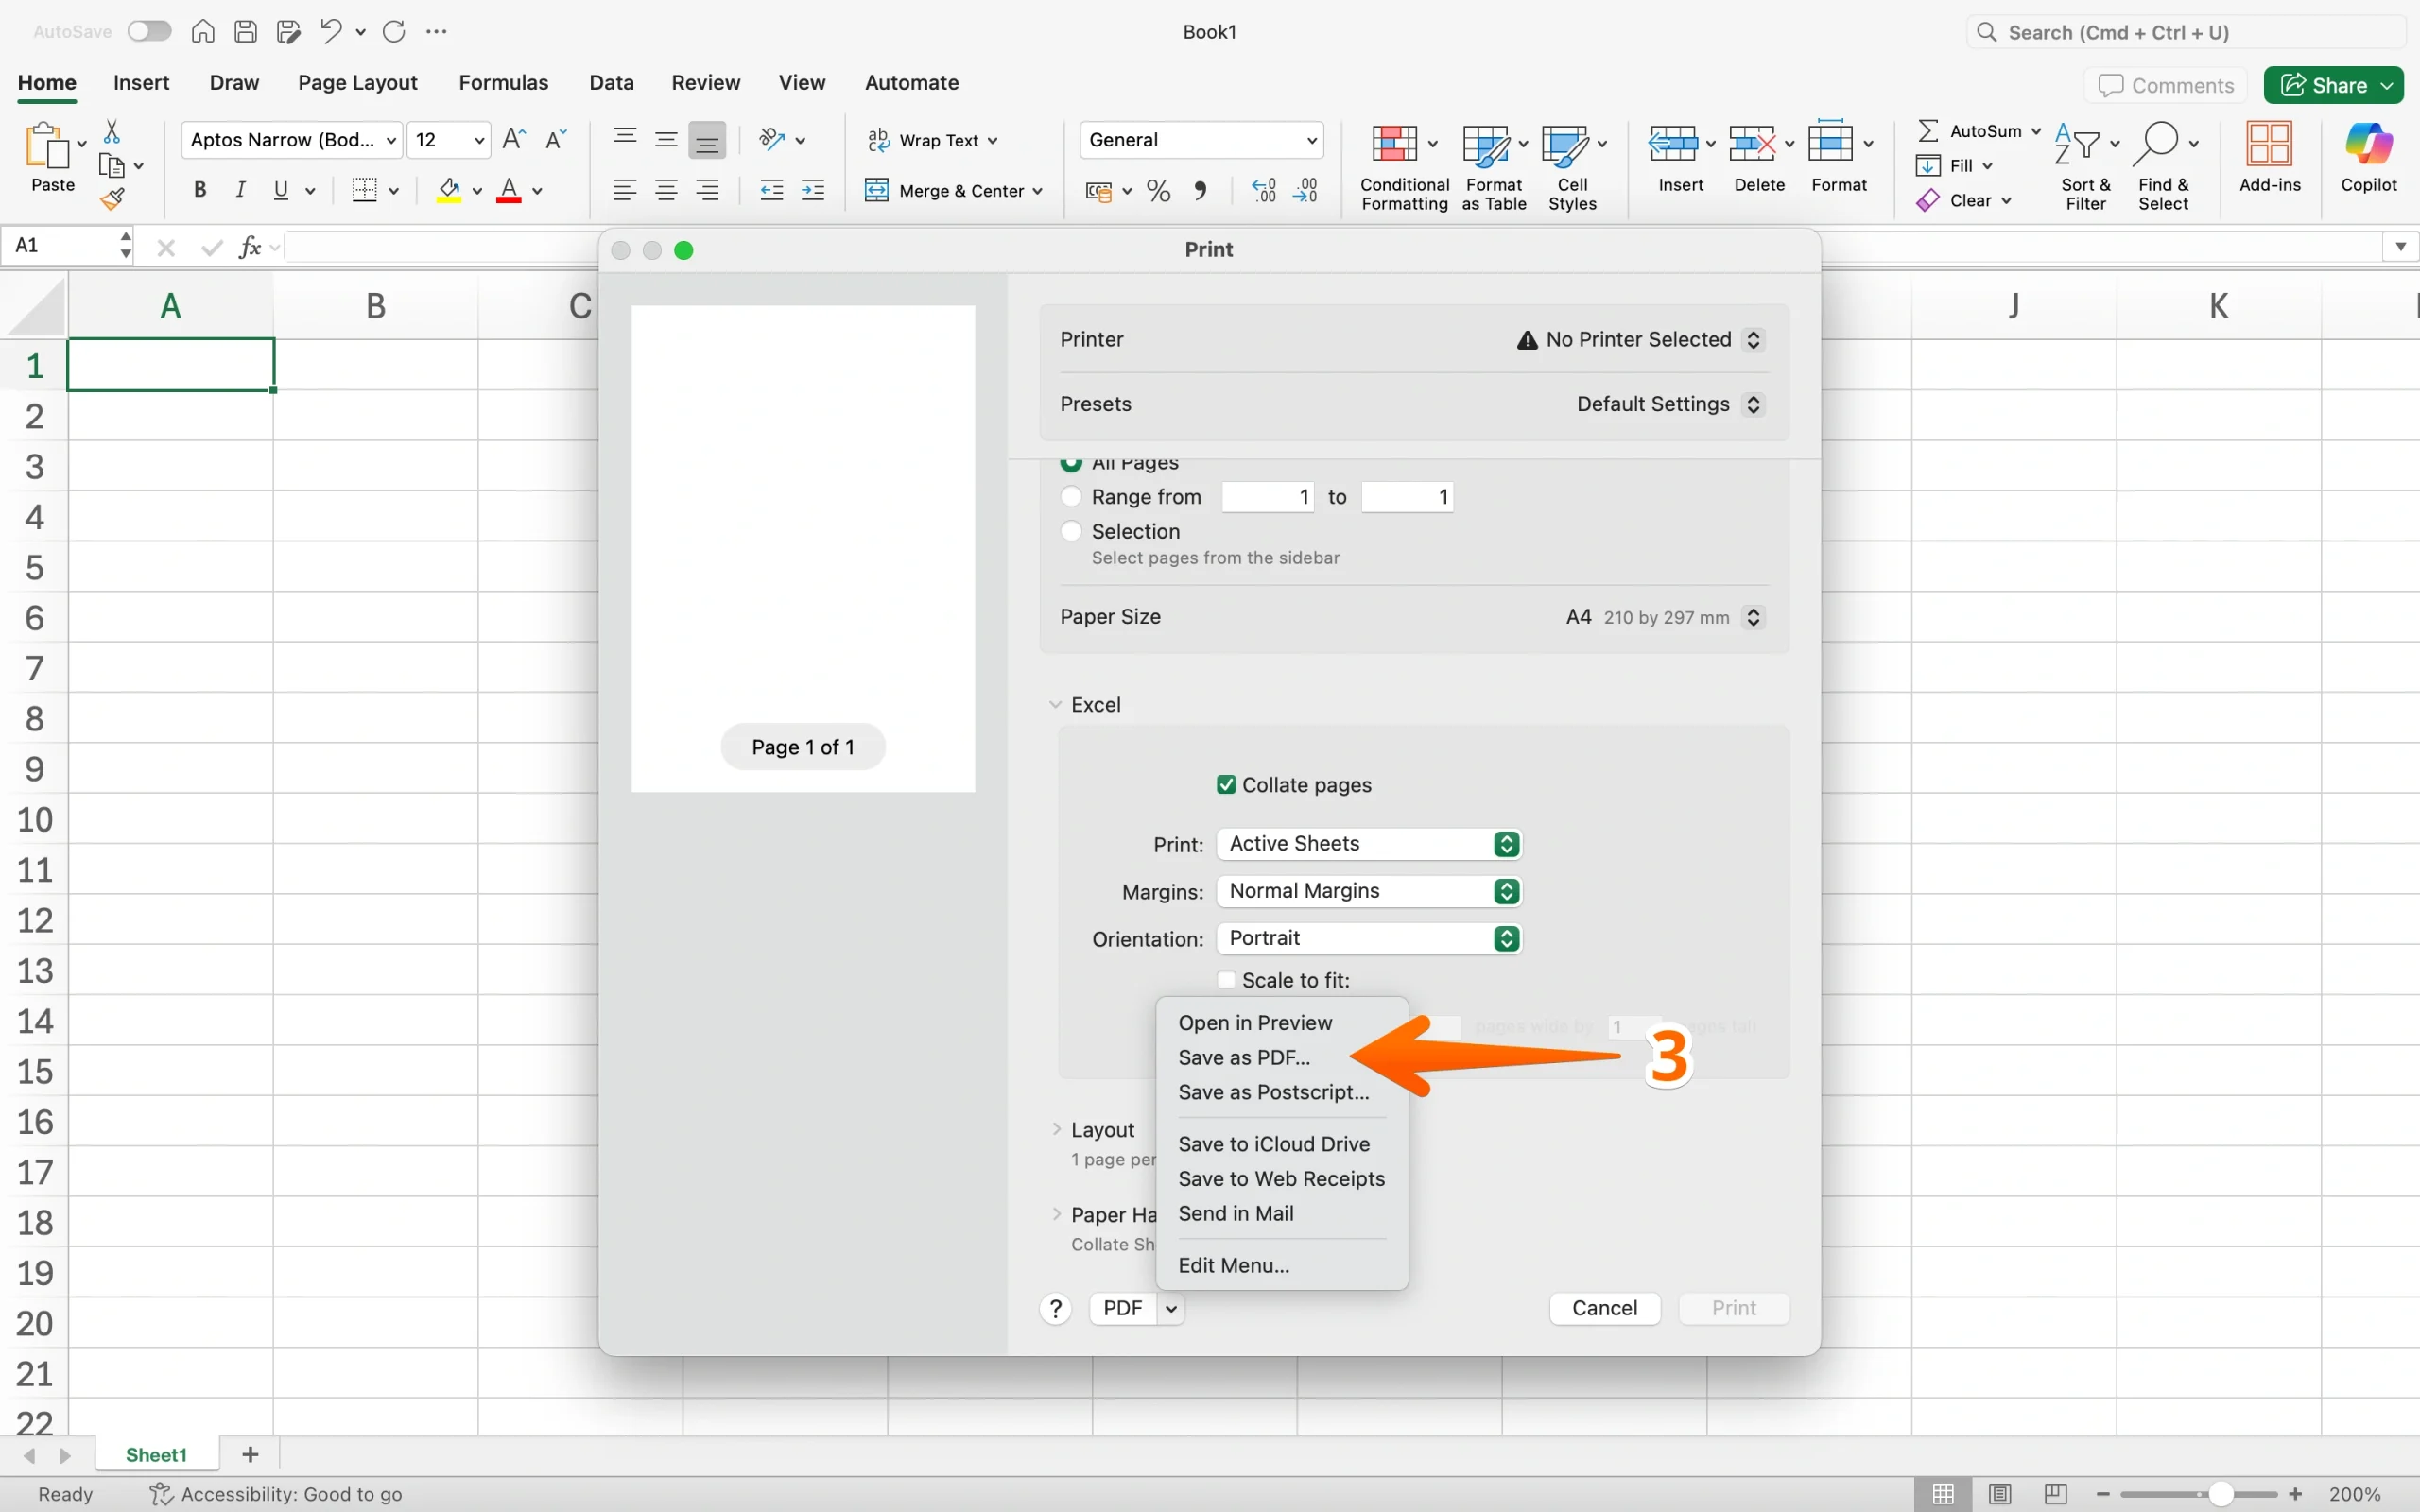
- Go to Settings to adjust orientation, scaling, and margins if needed.
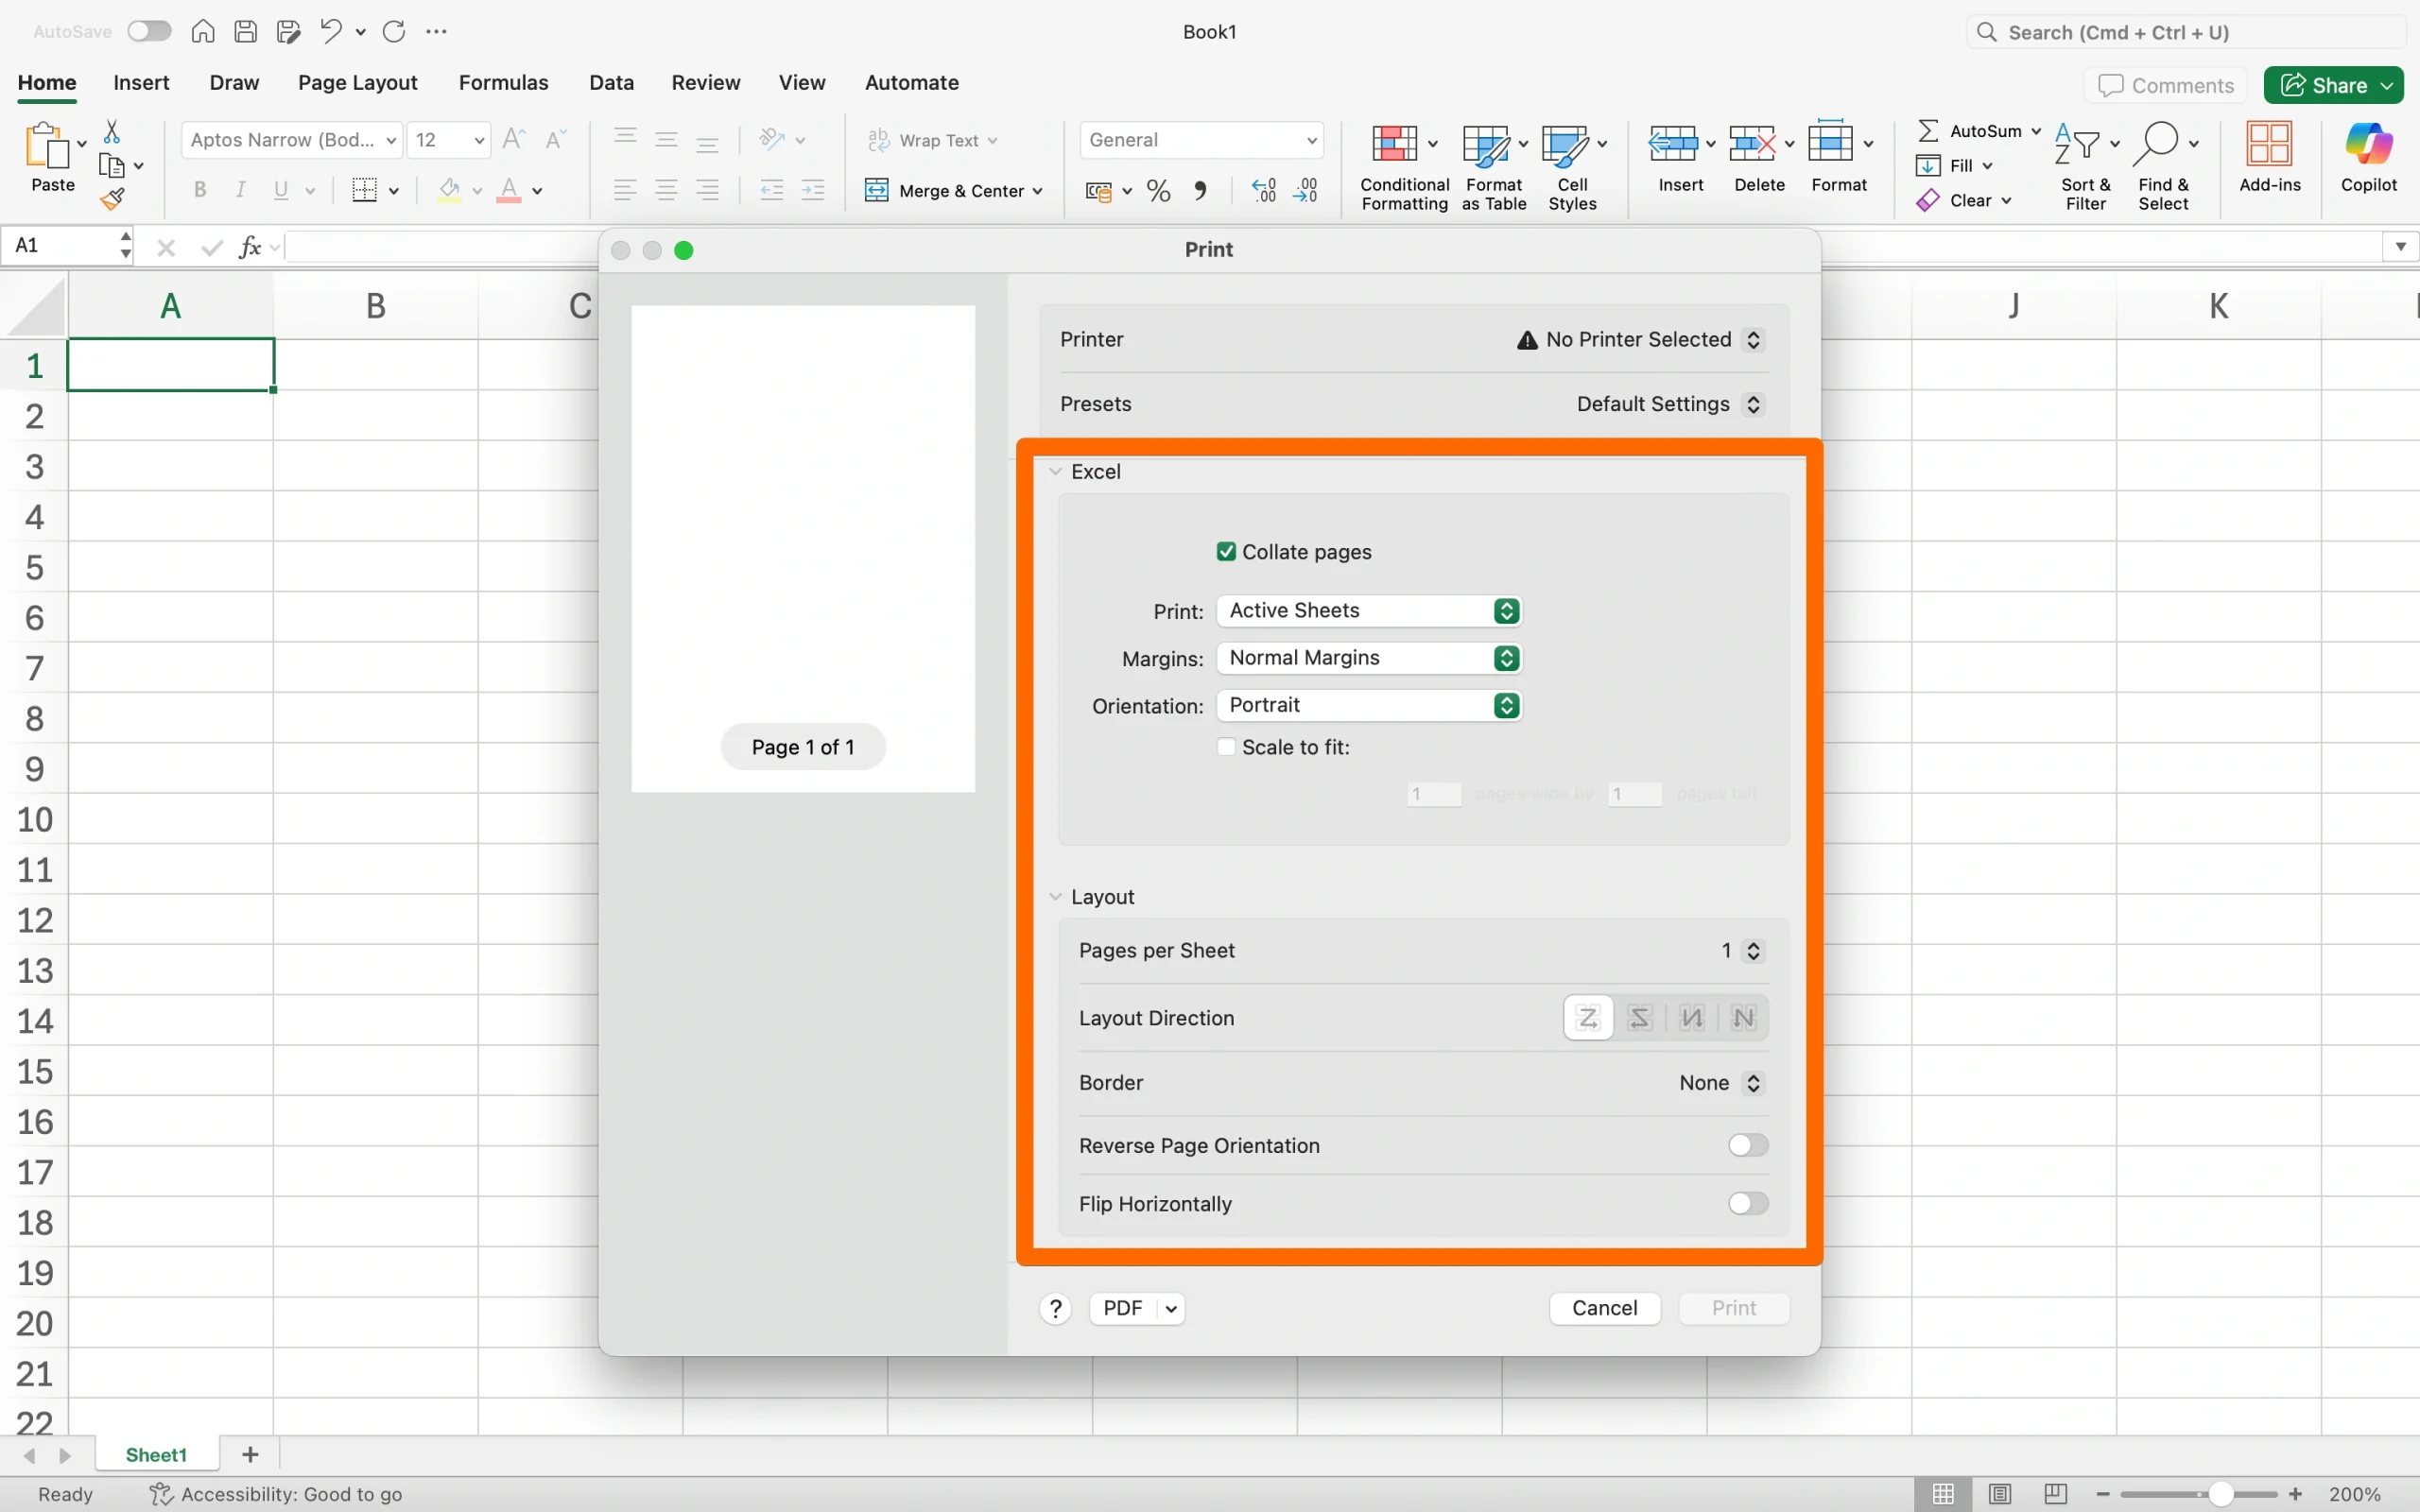
- Check the print preview on the right-hand side to make sure nothing is cut off.
- Click Print (Windows) or Save (Mac) and choose where to save the file.
Note: Although it says “Print” on Windows, clicking Print opens the dialog for saving the PDF to your PC. It won’t trigger a print.
This method is especially useful for wide spreadsheets or multicolumn layouts that tend to spill across pages.
3. Export Excel to PDF (alternative native workflow)
Excel also includes an Export option in the File menu for creating PDFs. It produces the same result as the Save As option but offers a slightly different workflow that some users find more intuitive and includes a few extra options before you save.
- Open your spreadsheet in Excel.
- Click File within the main menu and look for Export.
- Select Create PDF/XPS Document. This will open the Save File dialog so you can choose a location and save it.
- Enter a file name and choose a save location.
4. Use an online Excel-to-PDF converter
If you don’t have Excel installed, a browser-based Excel-to-PDF converter is a practical alternative. Tools such as Adobe Acrobat online and iLovePDF let you upload a file and convert XLSX to PDF in just a few clicks.
These tools work well for basic conversions, but they offer less control over layout and formatting than Excel’s built-in options. If the final document needs to look polished, it’s worth using Excel directly when possible.
How to convert only part of an Excel sheet to PDF
If you need only a portion of a spreadsheet in your PDF, such as a summary table, a specific data range, or a single chart, there’s no need to export the whole sheet.
Excel lets you define exactly what gets included before you convert the file to PDF.
There are two ways to do it.
Option 1: Set a print area
- Select the cells you want to export.
- Click the Page Layout tab.
- Click Print Area, then Set Print Area.
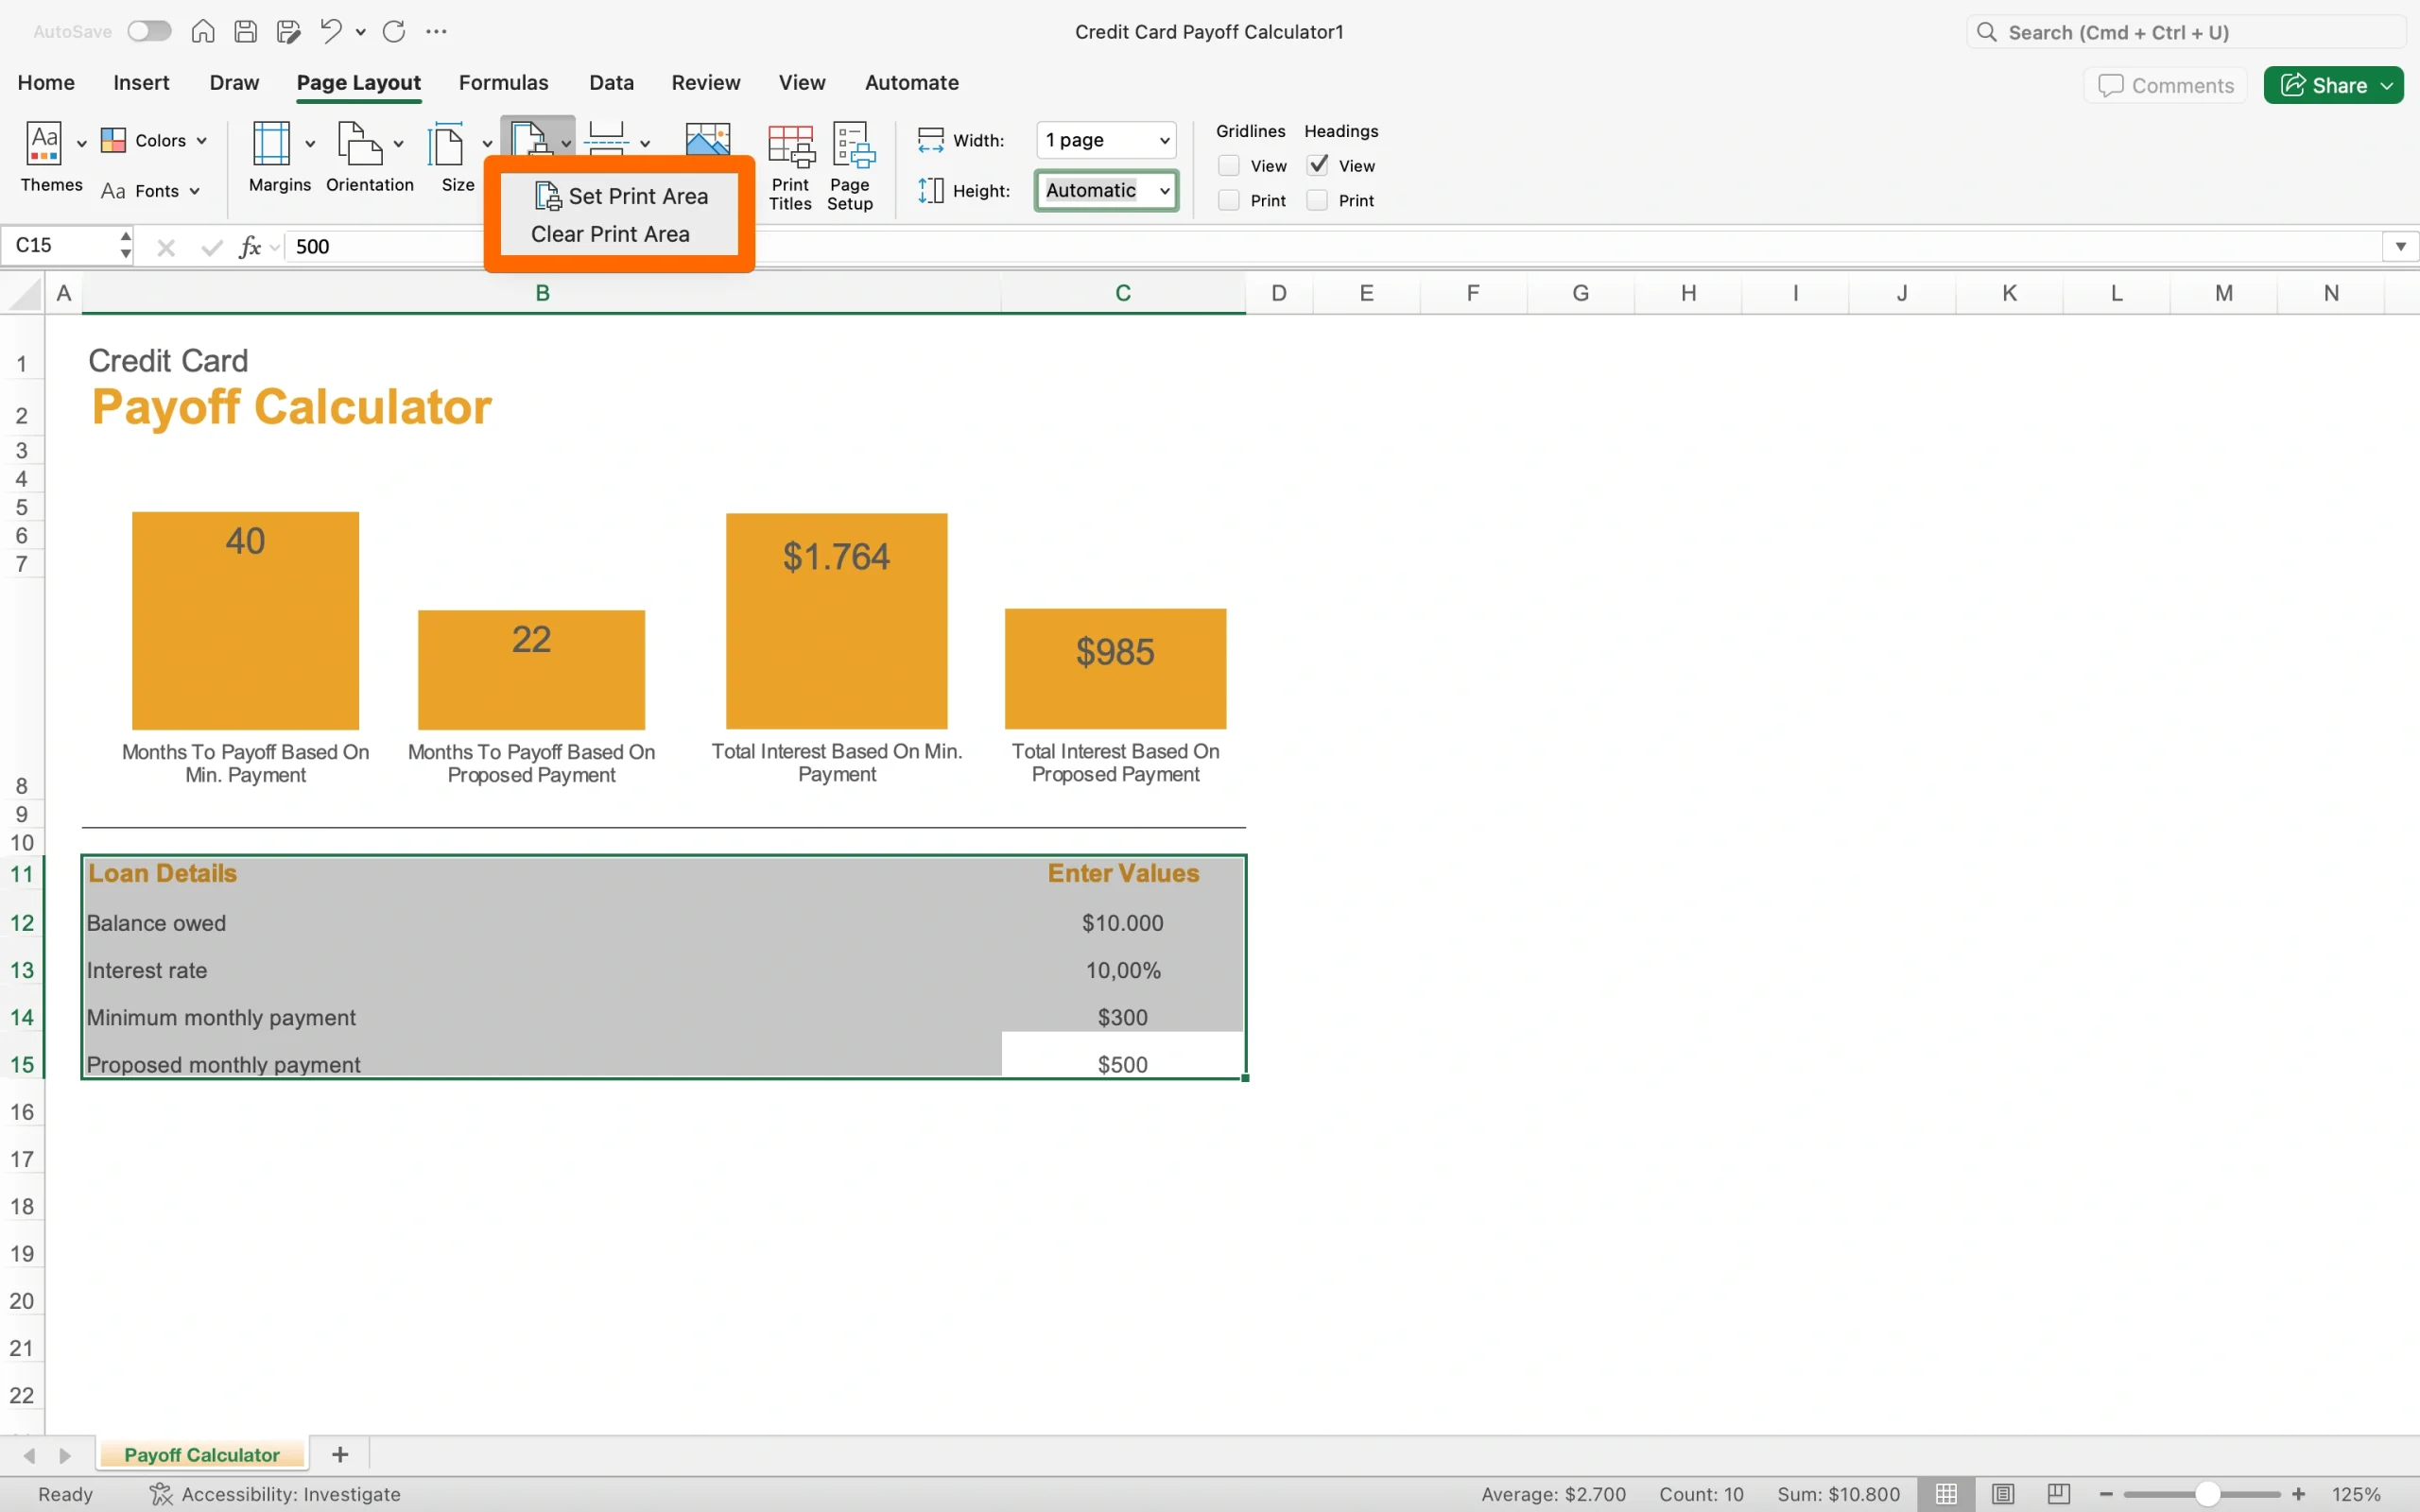
- Save the file as a PDF using any of the previous methods.
Excel will export only the defined print area. To clear it later, click Print Area again and click Clear Print Area.
Option 2: Export the selection directly
- Select the cells you want to export.
- Open the Print dialog (Ctrl+P on Windows or Cmd+P on Mac).
- Under Settings, change the first dropdown from Print Active Sheets to Print Selected Table.
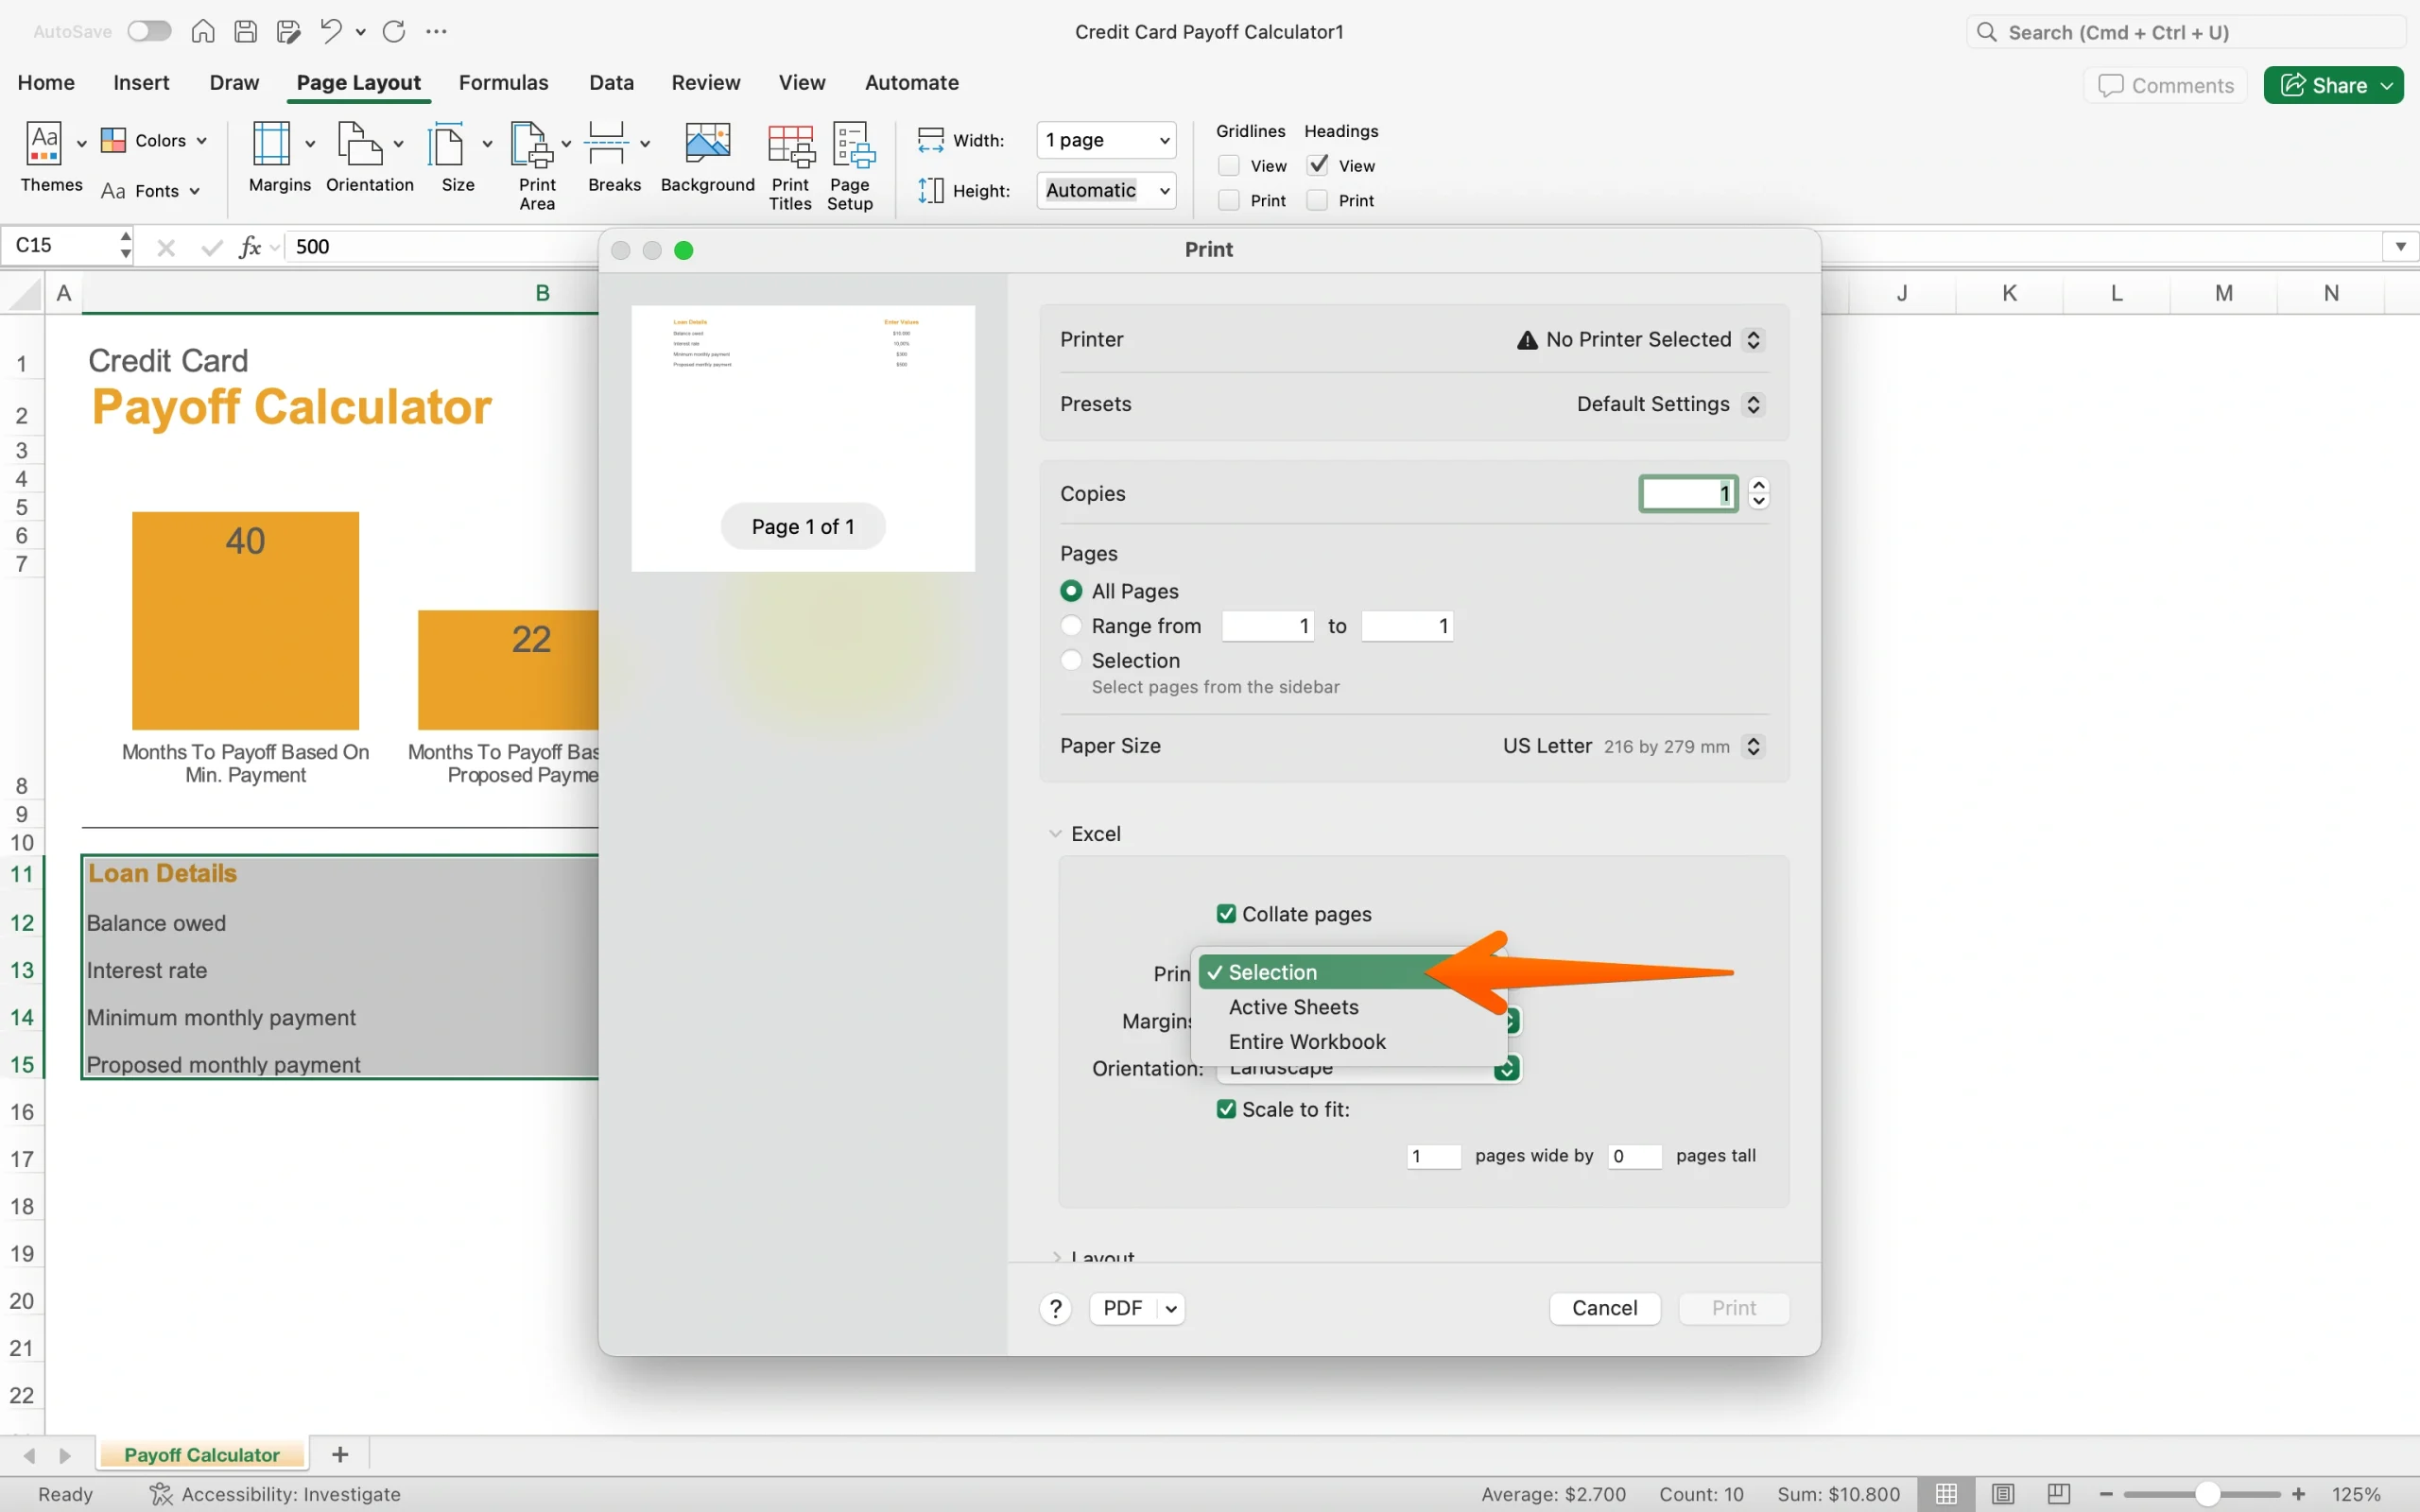
- Check the preview to confirm only your selection is showing.
- Save as PDF using any of the previous methods.
This option is quicker for a one-off export when you don’t need to save the print area for future use.
How to convert multiple Excel sheets to one PDF
When you’re working with a multisheet workbook, Excel gives you a couple of options: export every sheet at once or pick only the tabs you need.
Either way, the sheets come out as a single, continuous PDF in the order they appear in the workbook (so it’s worth checking the order before you export).
Option 1: Export the entire workbook
- Open the Print dialog (Ctrl+P on Windows or Cmd+P on Mac).
- Under Settings, change the first dropdown from Print Active Sheets to Print Entire Workbook.
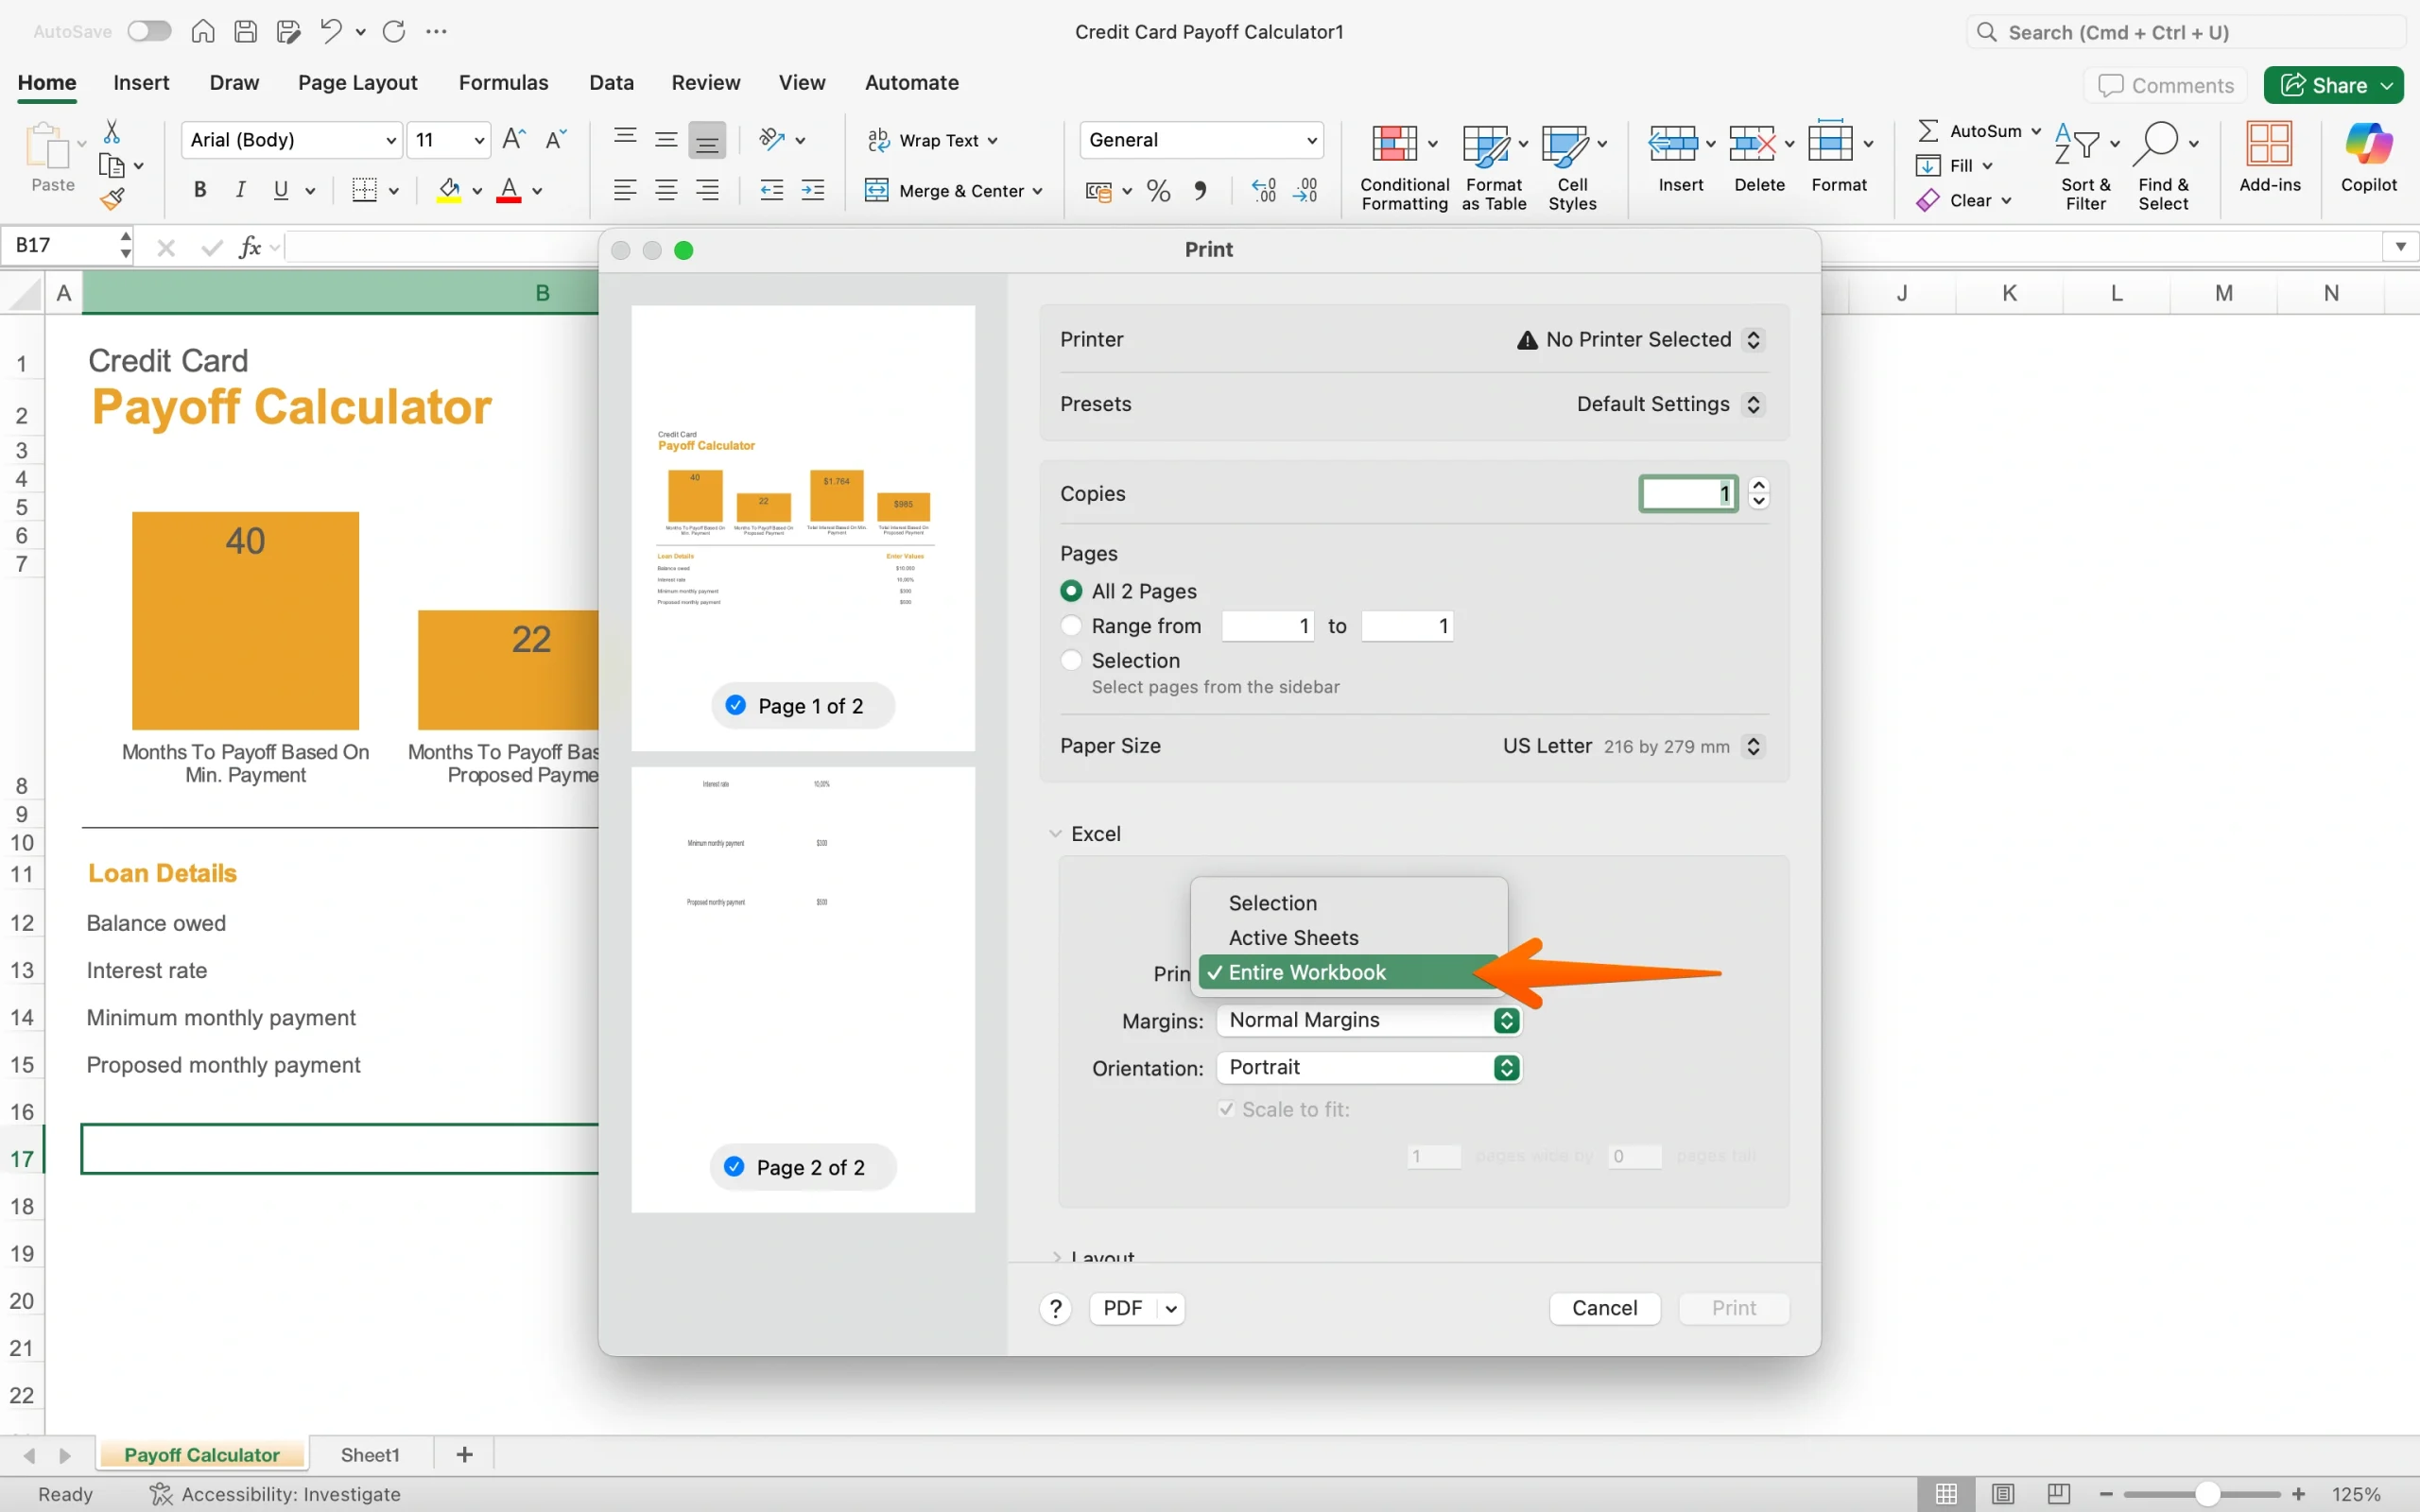
- Scroll through the preview to check that all sheets look right and are in the correct order.
- Save as PDF using any of the previous methods.
Option 2: Export selected sheets only
- Click the first sheet tab you want to include.
- Hold Ctrl (Windows) or Cmd (Mac) and click each additional tab you want to include.
- Open the Print dialog. If done correctly, it will automatically default to Print Active Sheets, which now covers your selection.
- Check the preview to confirm the right sheets are included and in the right order.
- Save as PDF using Microsoft Print to PDF or Save as PDF.
If the sheets need to be in a different order, close the dialog first and drag the tabs into the correct sequence along the bottom of the workbook before repeating these steps.
Pro Tip
Excel can export PDFs, but it is not built for document workflows. Excel works well for one-off PDF exports, simple sharing, printing, and internal recordkeeping. But if you need polished branded PDFs, automated document generation, e-signatures, or form-driven document collection, Excel quickly turns into a workaround instead of a real solution. That is where Jotform makes more sense.
Convert in Excel, do more with Jotform
Excel does a solid job of turning spreadsheets into PDFs. For quick exports, one-time shares, or files that just need to get out the door, the native methods covered in this guide will handle it.
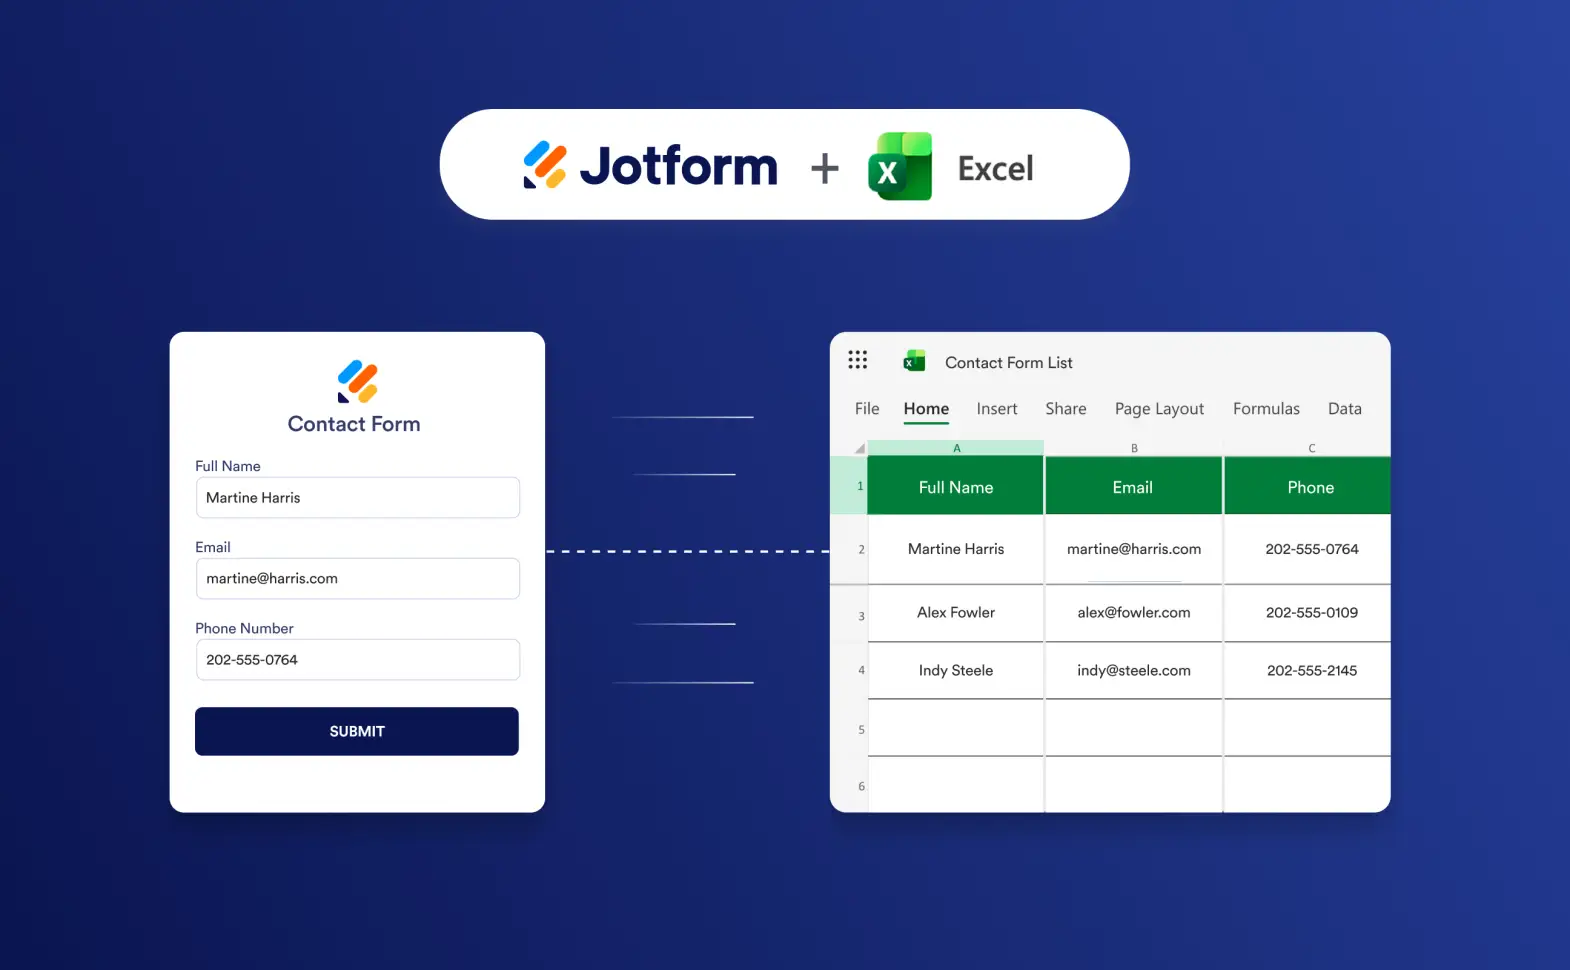
If you’re already working in Excel and don’t want to abandon your existing workflow, try the Jotform Microsoft Excel integration. It lets you connect your spreadsheet data directly to Jotform’s document and workflow tools.
But if you find yourself repeatedly fixing layouts, reformatting data for different audiences, or wishing your documents looked a little more professional, then there may be a better solution.
Jotform is built for solving those challenges. Instead of starting with a spreadsheet and wrestling the formatting into shape, you can build the document the way you want it to look from the start: branded, structured, and ready to share. Here are a few places where it makes a real difference:
- Polished PDF output: Jotform PDF Editor lets you design professional PDF documents from form submissions with full control over layout, fonts, and branding, which means there’s no post-export cleanup needed.
- Form-driven data collection: Collect information through a Jotform form and automatically route it into a formatted PDF, without any copy-pasting or manual formatting.
- Spreadsheet-style data management: Jotform Tables gives you a familiar spreadsheet view of your form data, along with the ability to connect that data to documents, workflows, and automations that Excel simply wasn’t designed for.
- End-to-end workflows: With Jotform Workflows, you can automate the whole process, from data collection to PDF generation and distribution, without building anything from scratch each time.
- Automated reports: Jotform Report Builder automatically turns your form data into visual reports. There’s no need for manual chart-building or formatting. Jotform also offers a library of 20,000-plus professional form templates to get you started fast.
Use Excel when you need to export a spreadsheet. Choose Jotform when you need to create, customize, and share professional PDFs with less manual work.
This article is for Excel users, admins, finance teams, operations teams, and small business users who need to turn spreadsheets into shareable, printable, or locked PDF files.


Send Comment:
2 Comments:
October 8, 2019
Nice and informative article....
One can try this link
August 28, 2019
I and my colleague use "Total PDF Converter". It works pretty cool for me. Here is the link for the website to download the software. They also offer free trial version. First try then buy.