
Often deal with registrations, service requests, product orders, or internal workflows? You may be looking for an easy way to collect data online and send it to Microsoft Excel without doing any manual data entry. After all, copying and pasting information from a web form to a spreadsheet is slow and easy to get wrong.
There are three solutions you can try: Use Microsoft Forms with Excel, build a form directly with Excel, or use another online form builder that has a direct Excel integration.
We’ll break down each of these ways to use a web form to populate an Excel spreadsheet, complete with detailed instructions. We’ll also specify the ideal use case for each method as well as limitations you may come across. By the end, you’ll know exactly how to select the right setup for your needs.
How web form–to–Excel data population works
The process to populate a spreadsheet with form submissions can be fairly straightforward if you use the right tools. It works like this: A user fills out an online form and their answers are sent automatically to a connected spreadsheet, populating its rows and columns with the form submission data.
This type of form-to-Excel workflow is useful for a number of situations, including
- Event registrations
- Customer intake forms
- Employee request forms
- Employee surveys
- Lead capture forms
- Order forms
- Customer feedback surveys
- NPS® polls
- Wedding invitations
With this type of automated workflow, you can minimize manual data entry errors, increase productivity, and improve data accuracy. The process also makes for streamlined reporting and data analysis in Excel.
3 ways to send web form data to Excel
Below, we’ll provide three ways you can send web form data to Microsoft Excel. The right approach for your needs will depend on the tools you already use and how you want to share the form.
Option 1: Use Microsoft Forms with Excel
This Microsoft Forms-to-Excel method is useful if you’re already a Microsoft 365 user, are familiar with Microsoft Forms, or need to create simple online forms and surveys without a lot of bells and whistles. Microsoft Forms isn’t an advanced form builder, but it does the trick if you need something straightforward.
Microsoft Forms has a built-in feature that lets you easily open your form responses in Excel. Here’s a general overview of how to export form responses in Microsoft Forms:
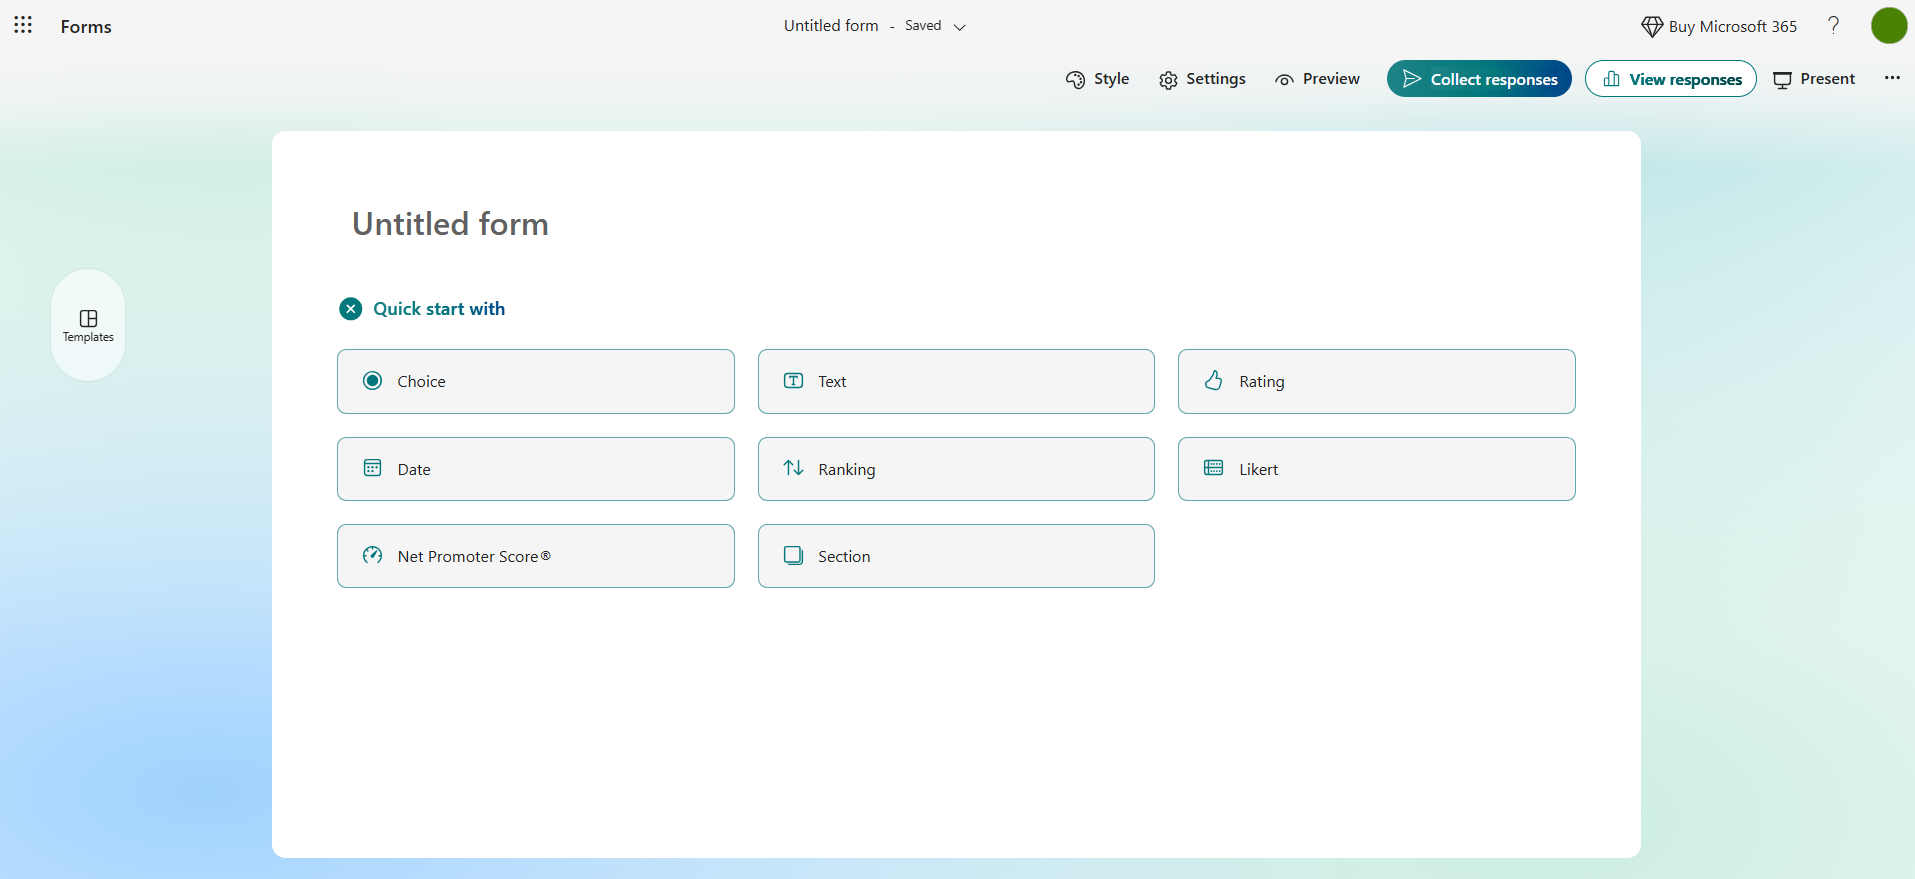
- Open Microsoft Forms and click New Form. Click Quick start with or Add new question to add in the fields you need to collect data. Continue adding new questions until you’ve completed creating the form. (If you already have a form created that you want to use, skip this step.)
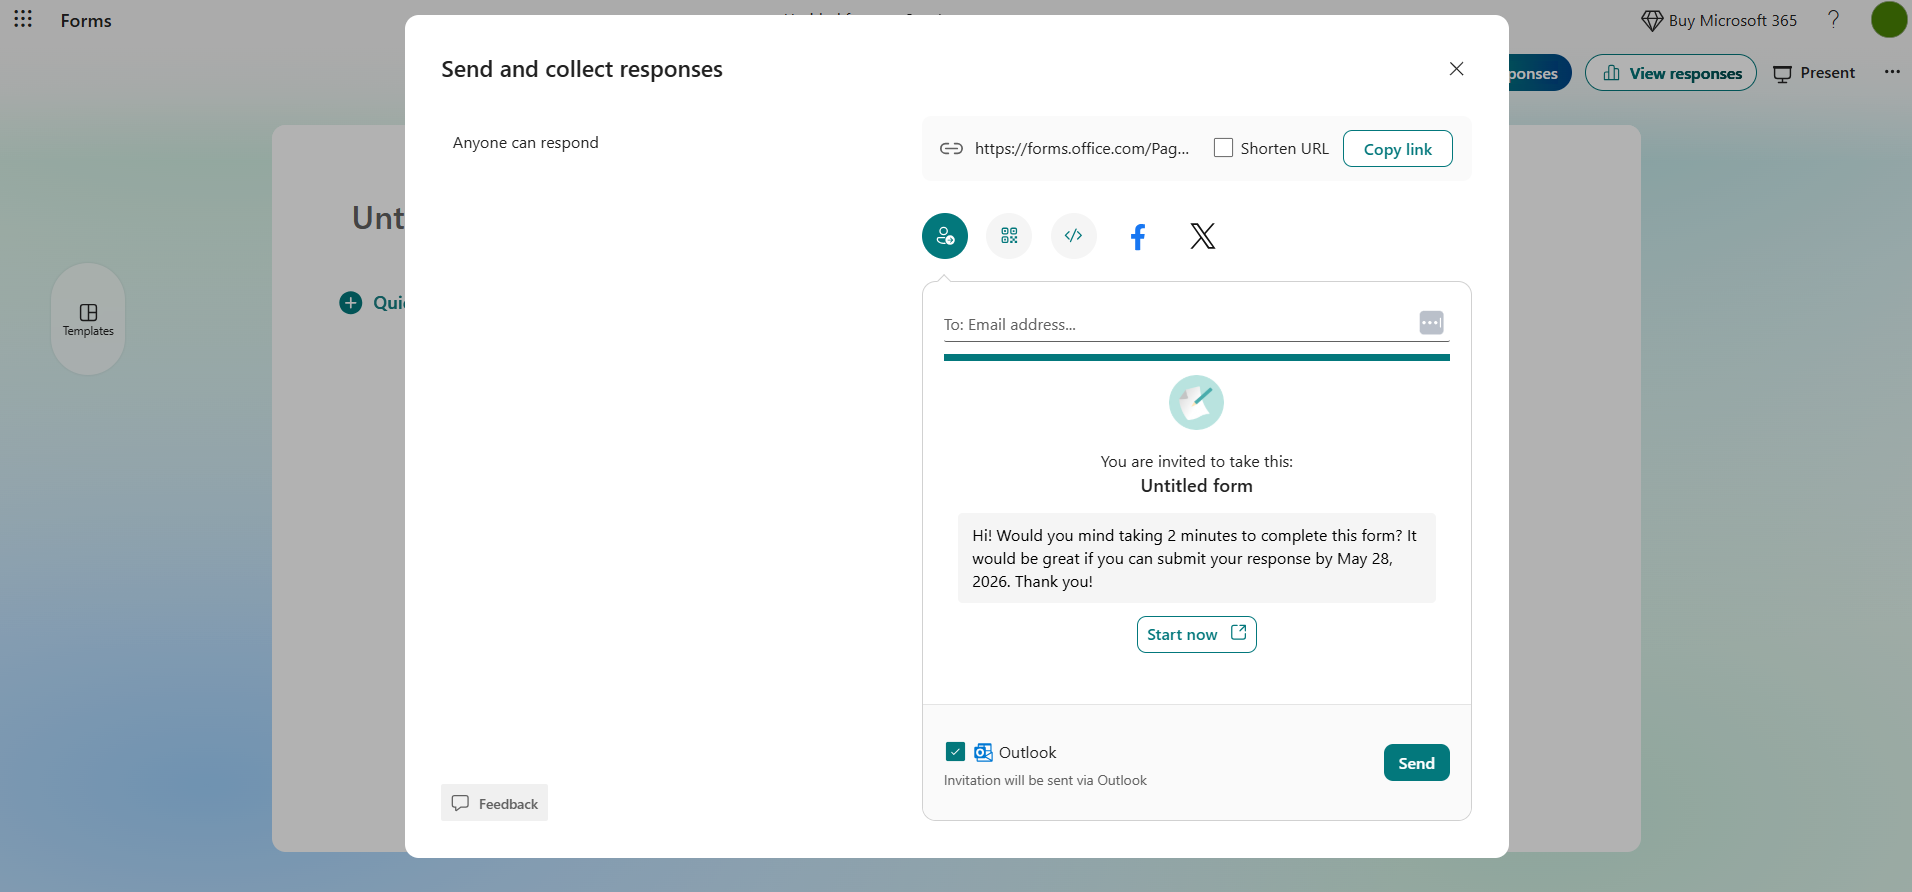
- Once complete, click Collect responses and type in the email addresses of the users you want to send the form to. You can also copy the form link and send it to users.
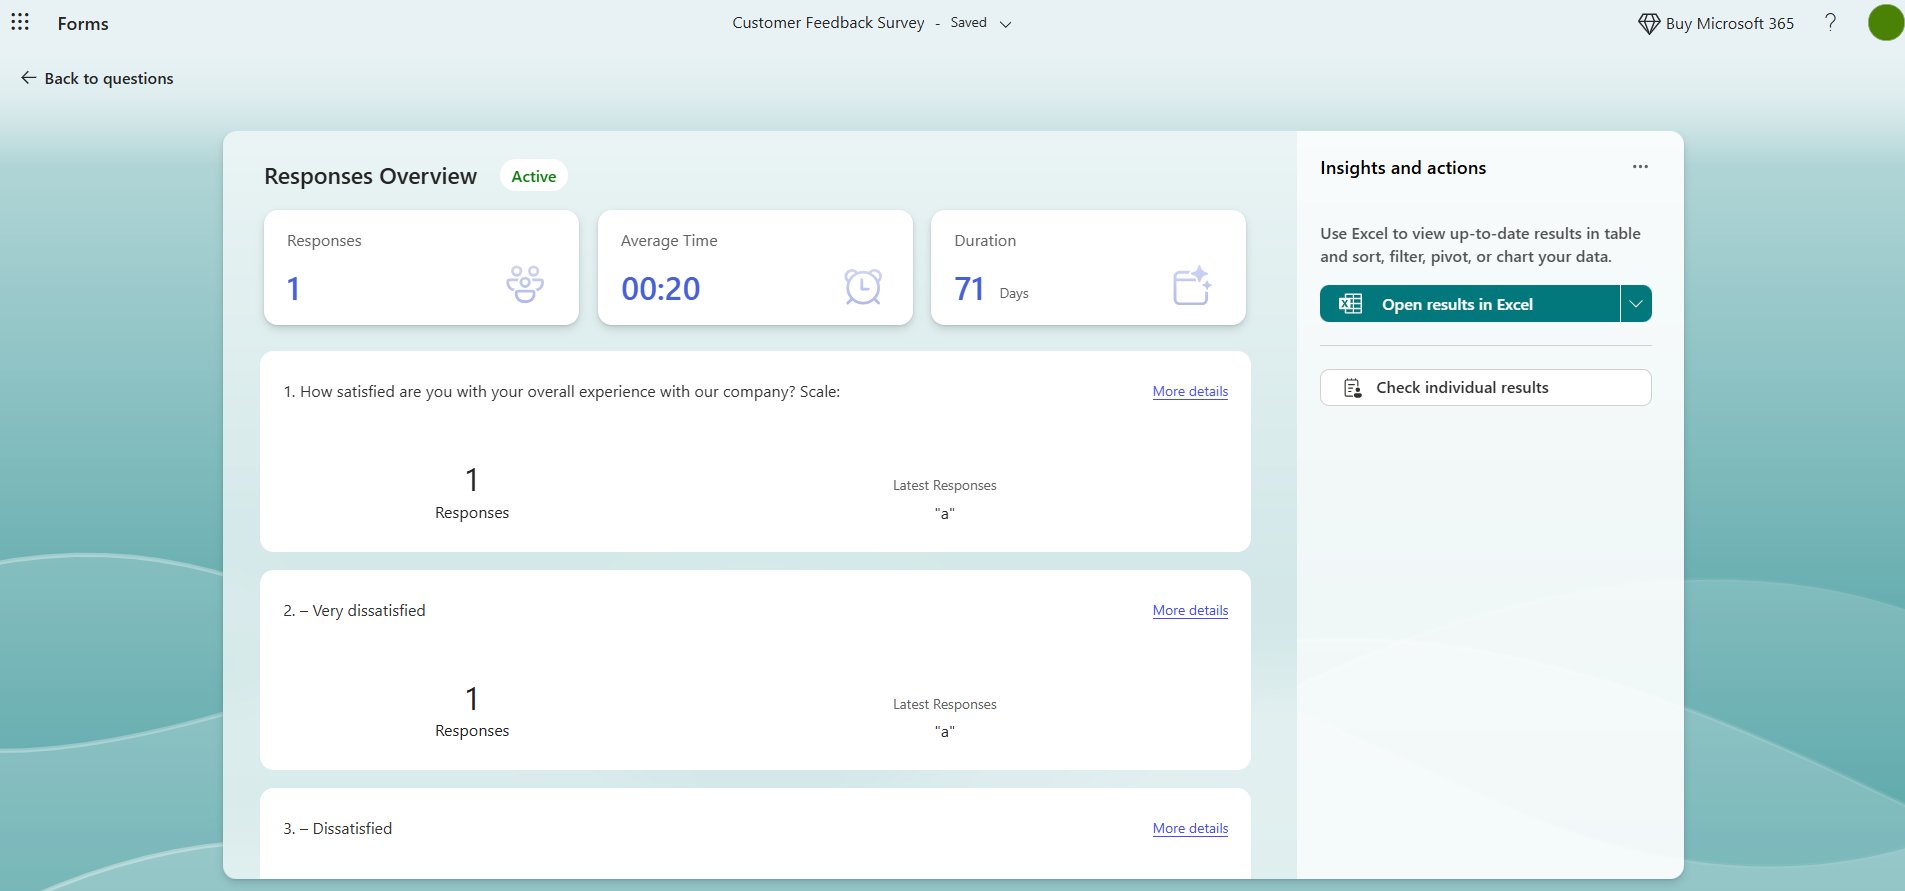
- Once you’ve gathered some data from respondents, click View responses. Then click Open results in Excel. You can open the spreadsheet in Excel for the web or Excel desktop. Note that this option only activates once you’ve shared your form and users have submitted responses.
Keep in mind that the automatic sync feature works with Excel for the web and syncs every time you open the spreadsheet. If you use the desktop version of Excel, you won’t have a live sync — instead, you’ll get a snapshot of your data at that specific moment in time.
Pro Tip
Microsoft Forms is a dedicated form builder — but a basic tool. If you want to take your form to the next level with built-in advanced functionality, native integrations, and dozens of useful widgets, try Jotform. See how both tools compare in our Jotform vs Microsoft Forms article.
Option 2: Build a form directly in Excel
Need to collect data from your team or department? You could try creating a form in Excel.
Note that this method is best for internal manual data entry or collecting data from your team or department — not for when you need public-facing forms for external users. Excel forms are also a good option if you’re the only person who will be providing data.
Here’s how to create a form in Excel:
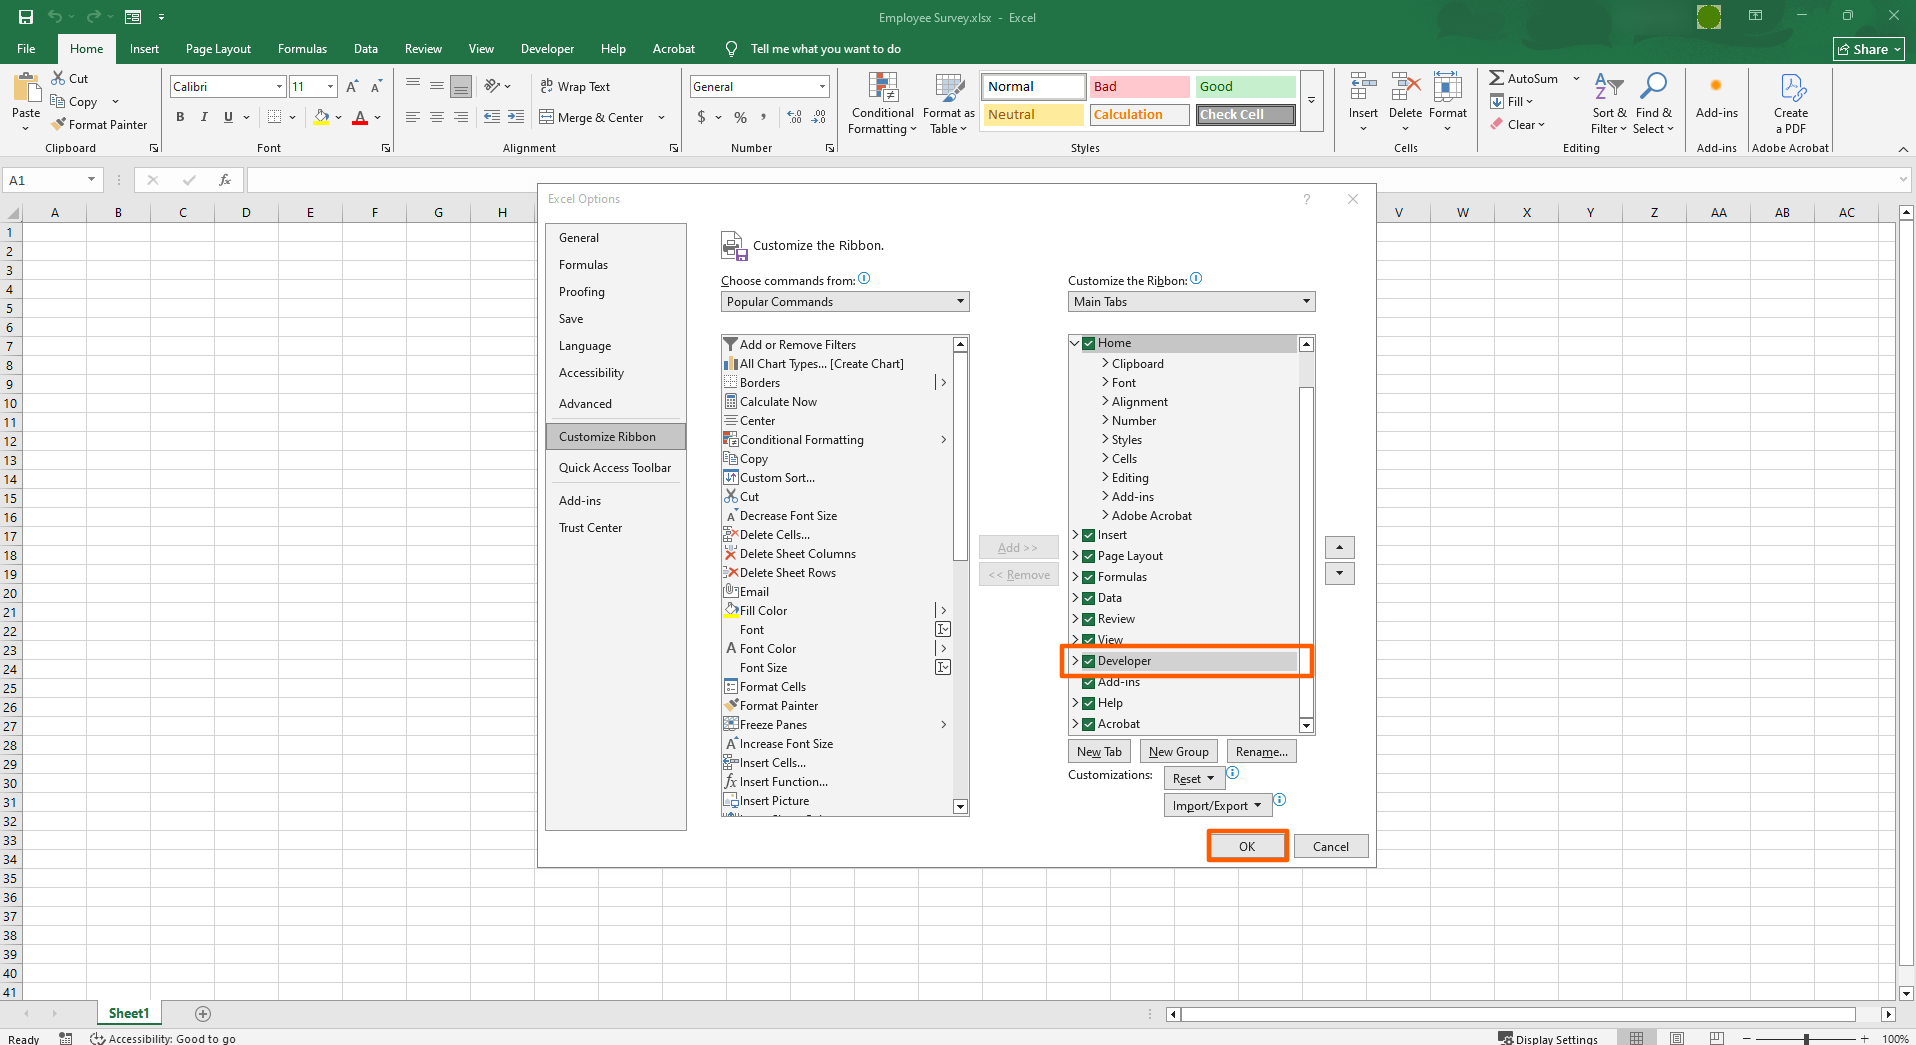
- Click File, then click Options. Click Customize Ribbon in the left pane. Select the Developer checkbox under Main Tabs. Click OK.
- Add the content you want to appear in your spreadsheet. Then go to the Developer tab in the ribbon and click the Insert dropdown menu. From here, you can select which form controls (or form fields) you want to use. Options include text boxes, dropdowns, checkboxes, and more. Right-click on the control you’ve inserted and click Edit Text to edit the content. In this case, we’ve renamed the control to True.
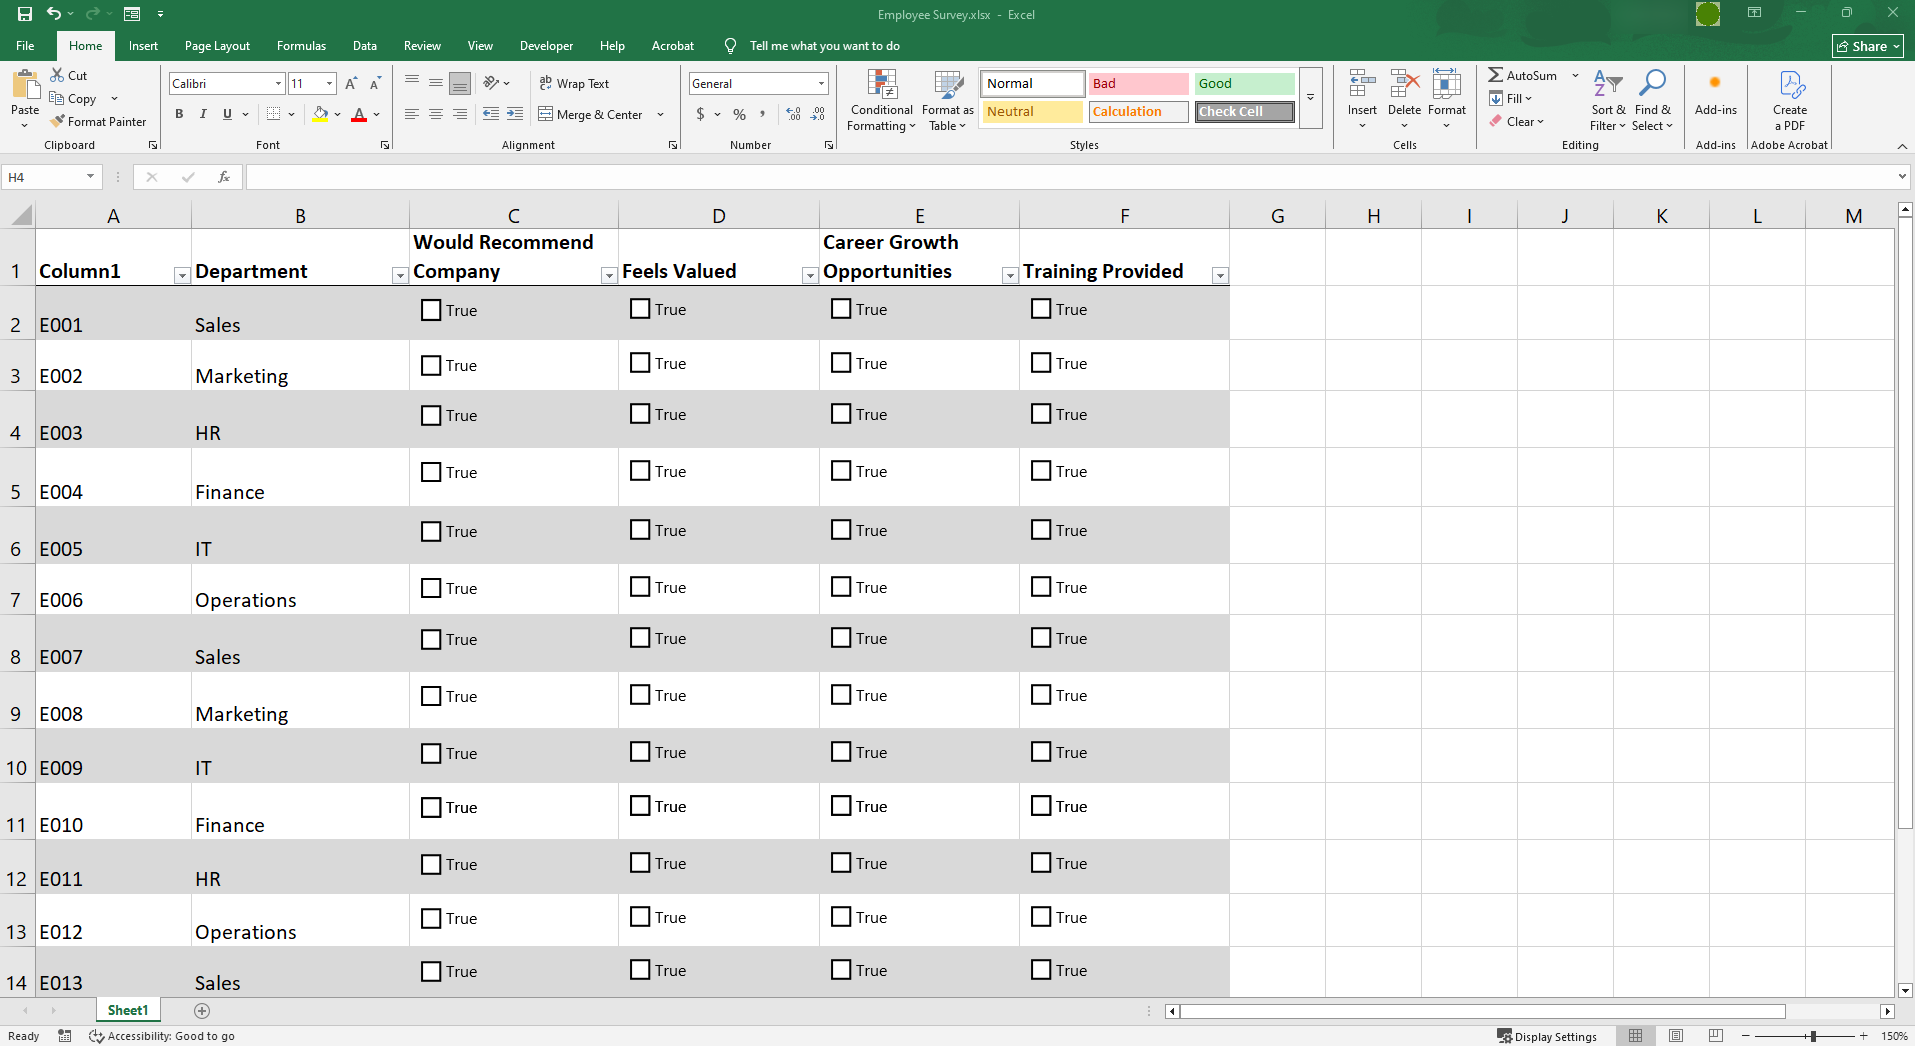
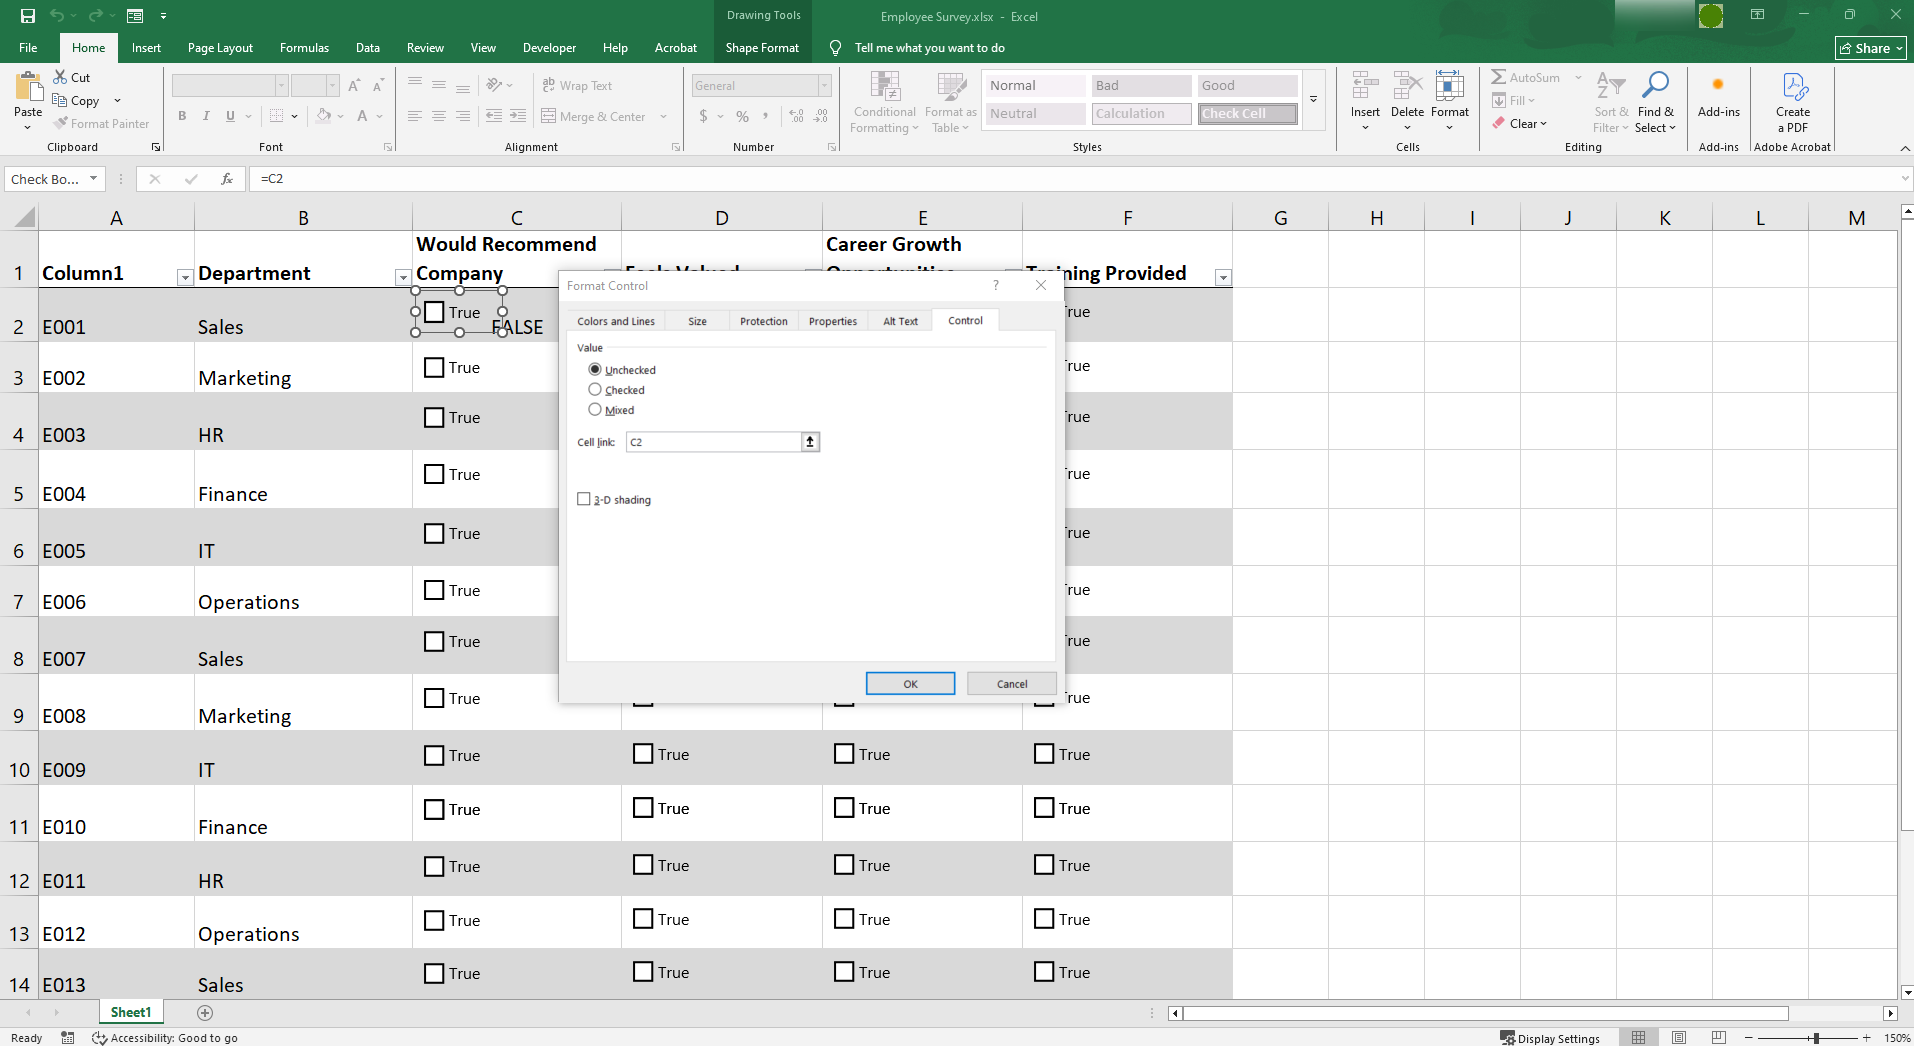
- Ensure that the form fields you’ve selected are aligned with the columns in Excel. Right-click on the form control, click Format Control, and choose your settings. Go to the Control tab, click Cell Link, and specify where the response from the field should go. You can only link one field to one cell. In this case with checkboxes, if the cell is checked, the response is True. If it’s unchecked, it’s False.
- To share the file internally for data entry, you can upload the Excel file to OneDrive, SharePoint, or a similar tool. Let them know that it’s ready for them to access and edit the file.
The limitations of using Microsoft Forms with Excel or Excel alone
You’ve seen how to connect Microsoft Forms with Excel and how to make a form in Excel — so you know neither of those are ideal methods for using a web form to populate an Excel spreadsheet. There are a number of limitations to consider:
- Limited design and branding options: Microsoft Forms is a basic form builder, so it doesn’t come with advanced features or customization options. Excel is a data management tool, not a design tool. If you want to create a customer-facing web form that aligns with your brand or design vision, you’ll have to look elsewhere.
- Less flexibility for advanced workflows: Want to collect payments, create approval workflows, or use advanced conditional logic in your customer-facing web form? None of these are possible with Microsoft Forms or Excel. To get these advanced features, you’ll need to go with a dedicated form builder that has them built in.
- Poor user experience: If you’re sharing web forms with external users, such as your prospects and customers, then user experience is key. You need web forms that are mobile-responsive and can be easily embedded into websites. Microsoft Forms and Excel are limited when it comes to providing an enhanced user experience.
If you need to create an attractive web form that’s public-facing, has advanced workflow features, and provides a good user experience, it’s time to turn to a dedicated form builder that integrates directly with Excel: Jotform.
Option 3: Use an online form builder with an Excel integration
If you want to create customized web forms for external users — and you want a linked Excel spreadsheet to populate automatically with the data — then the best option is this: Use a dedicated online form builder that has a native integration with Excel.
Jotform is a leading online form builder that’s a great alternative to Microsoft Forms and Excel’s form tools. With a no-code user interface, a range of advanced functionalities, and native integration with Excel, you can easily create a custom web form to populate your sheets automatically.
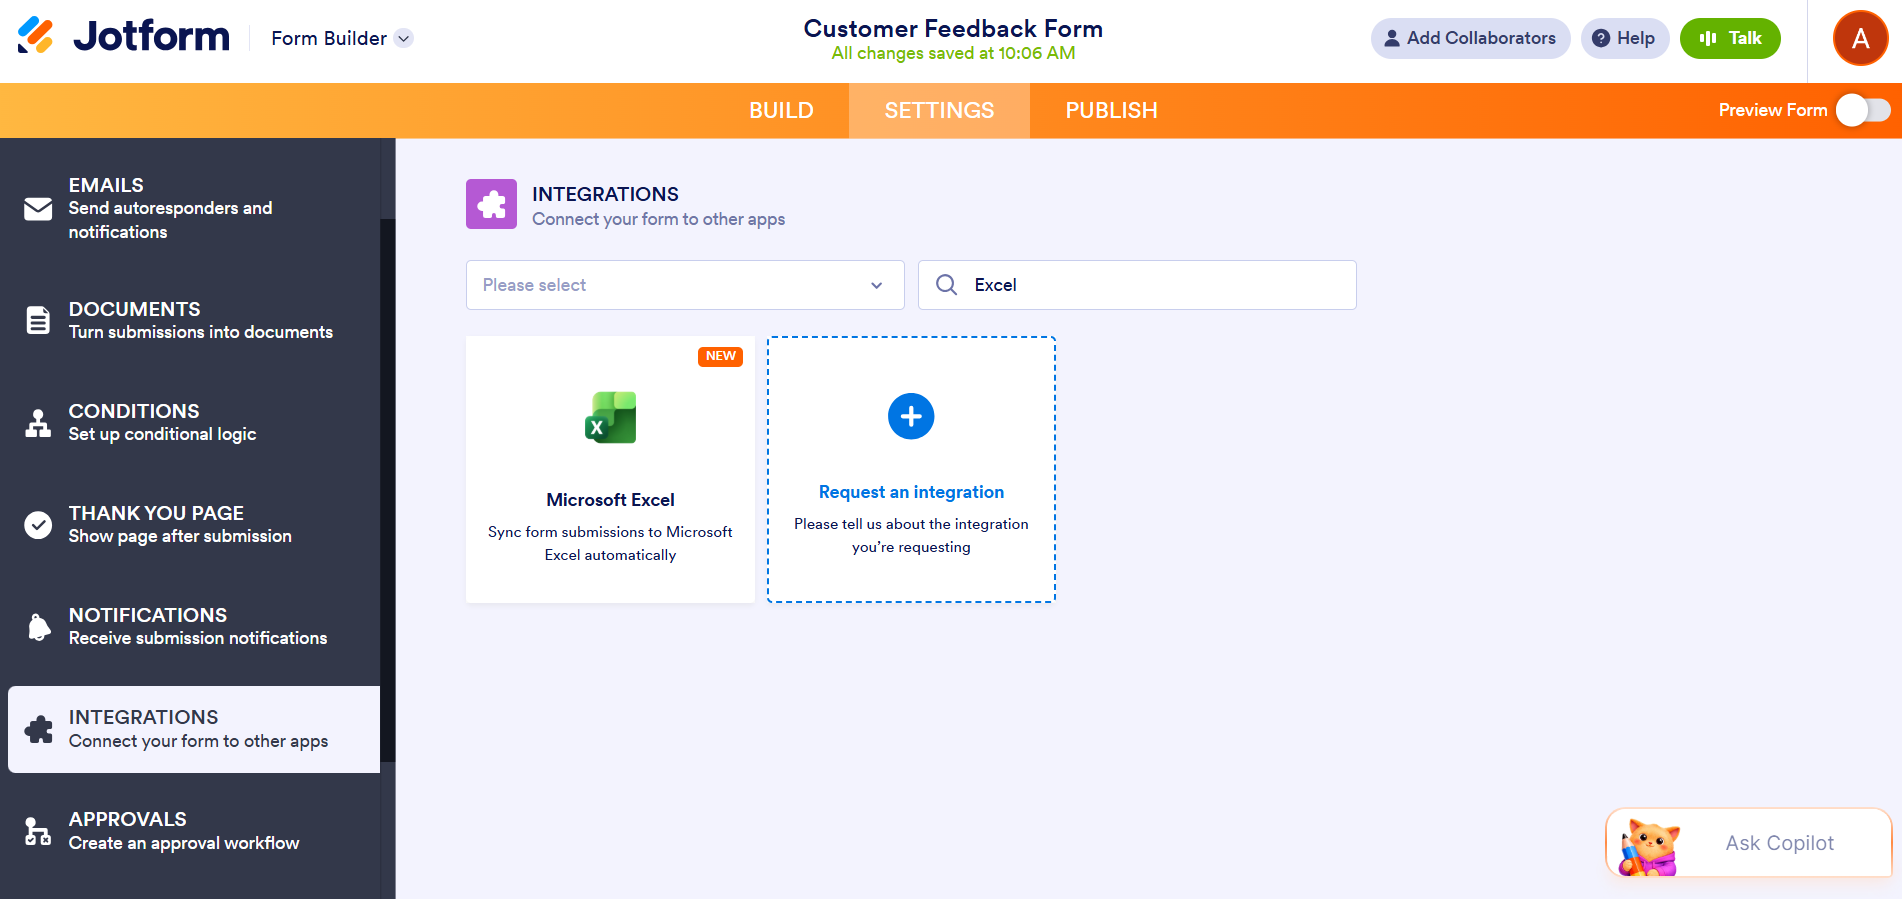
The Jotform-Microsoft Excel integration has a straightforward setup, with no third-party or automation tools required. Once your form is connected to Excel, submissions flow straight into your Excel spreadsheet. You can choose to add rows to a new or existing workbook or a new or existing table. It’s the ideal solution for users who want advanced form-building features coupled with Excel’s data management capabilities.
How to connect a web form to Excel automatically using Jotform
Setting up the Jotform-Excel integration is easy and takes just a few minutes. Follow these steps:
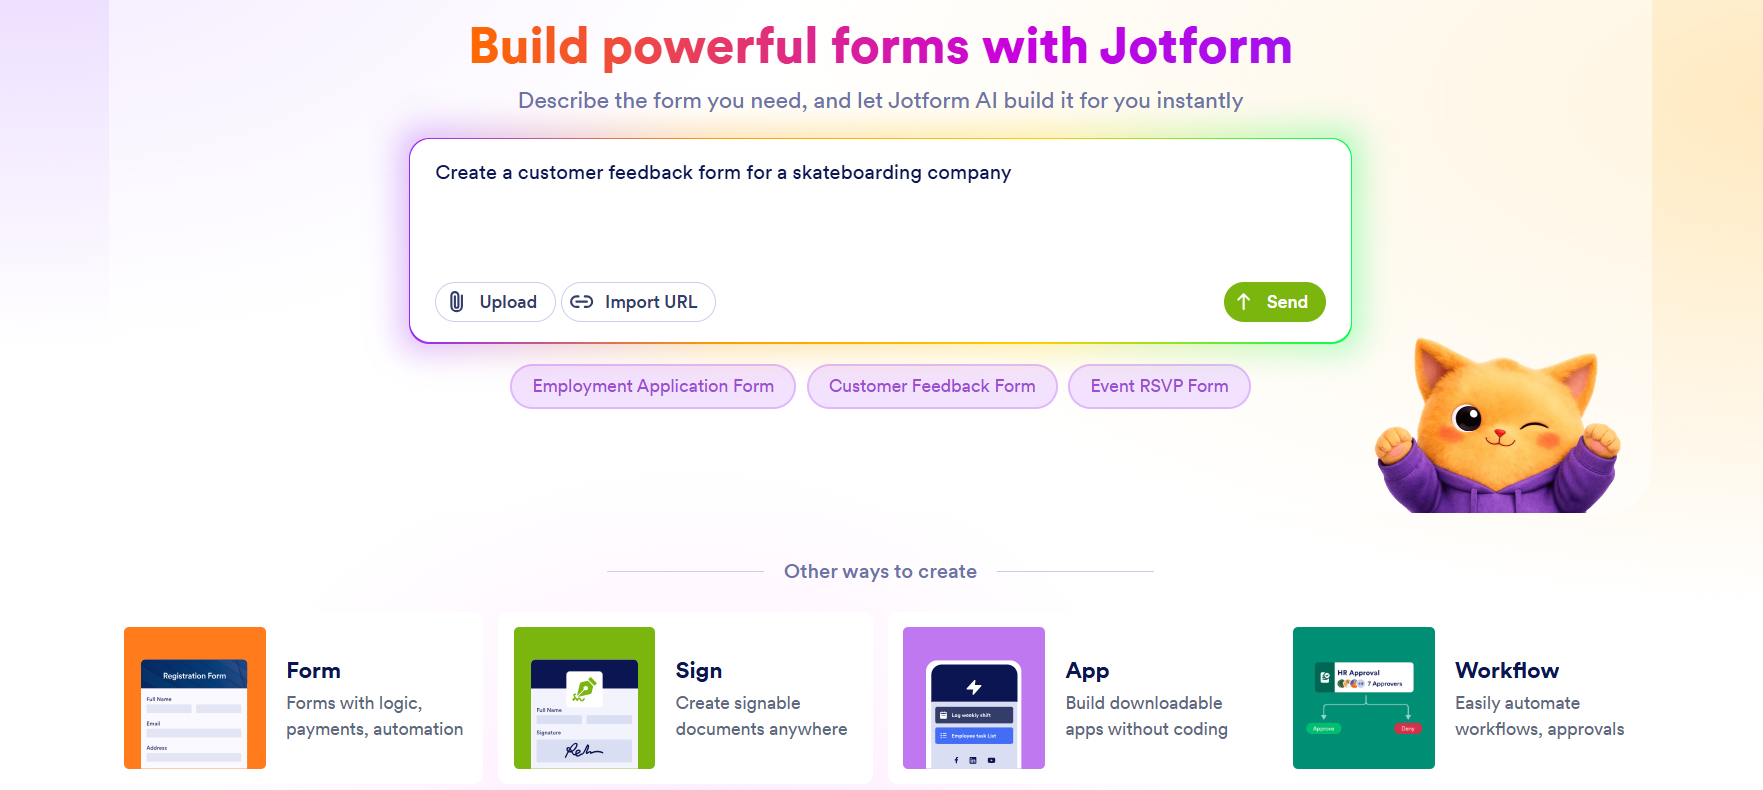
- Sign up for a free Jotform account and create a form that you’ll connect to Excel. Click +Create. You can use a template, start a new form from scratch, or use Jotform’s AI form builder to create your form.
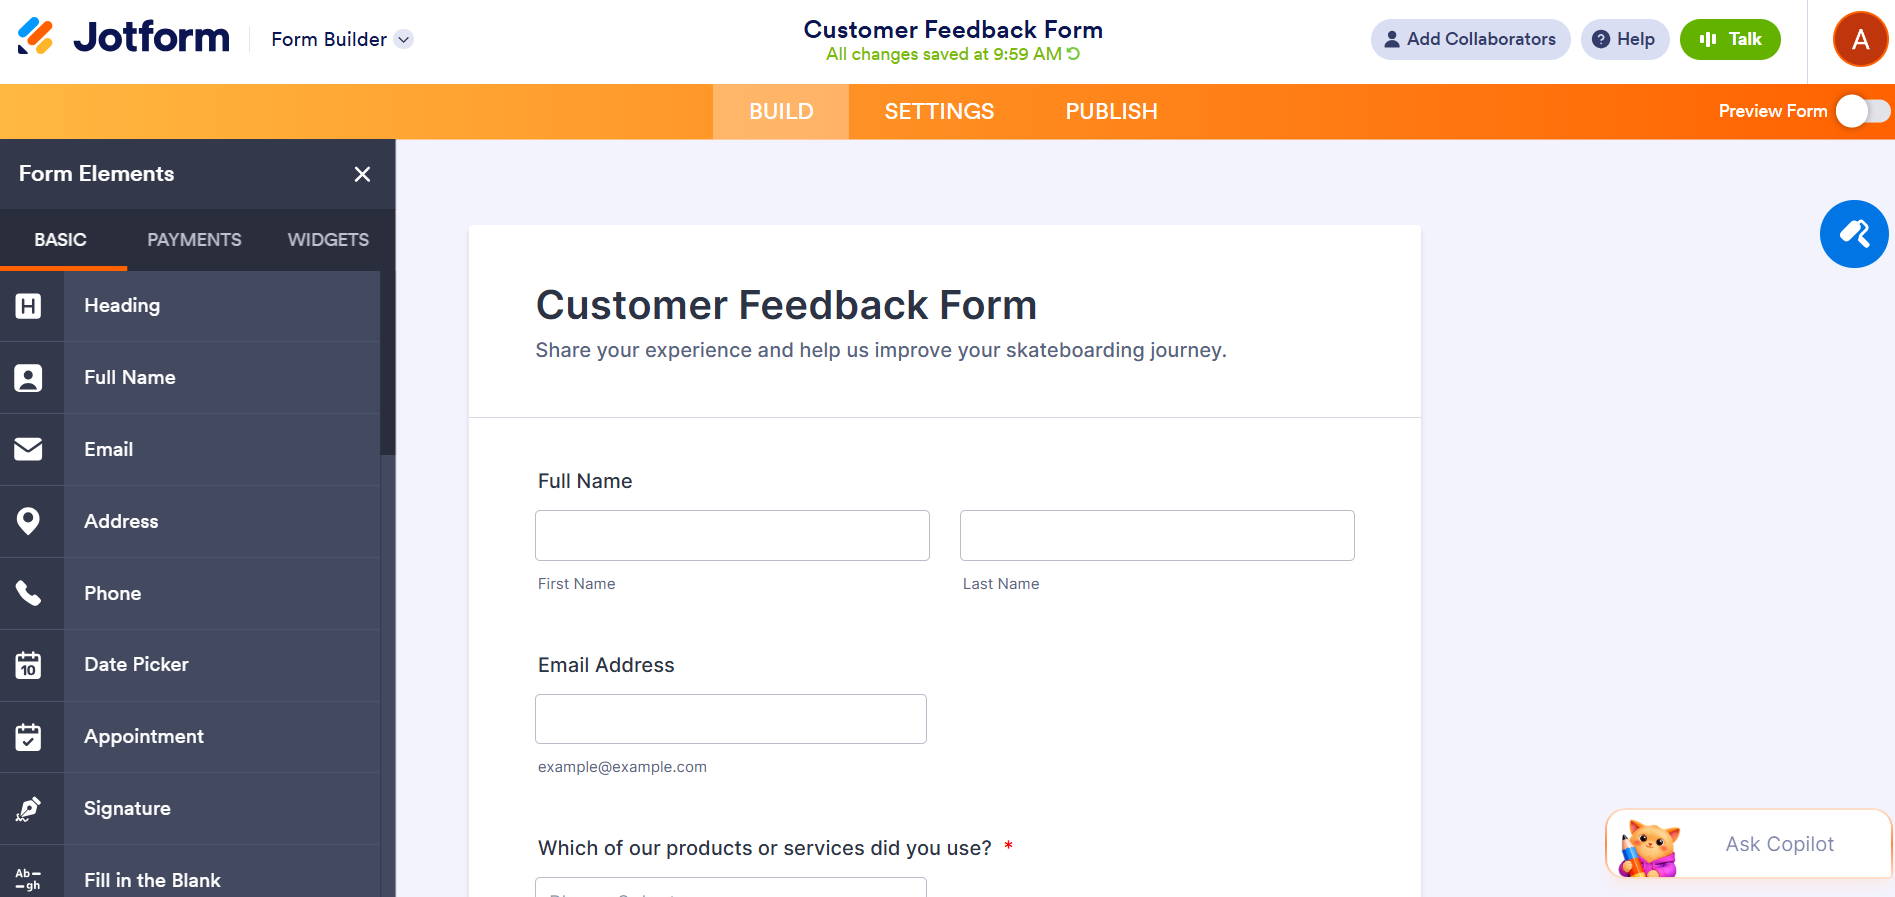
- Use the Form Elements toolbar in the Jotform Form Builder to tailor the form to your needs. Simply click on the form element you want to add and drag and drop it into the form. From here, you can also add payment integrations and widgets.
- Enable the real-time synchronization of form submissions by integrating the form with Excel using native tools. (See our detailed step-by-step article, How to integrate your form with Microsoft Excel.) You can specify if you want to send submissions data to a new or existing workbook or to a new or existing Excel table.
- Share the form with your users by clicking Publish and choosing an option. You can send the form via email, embed it into a website, share the form with the link, or share it via social media. Select the sharing method that’s best for your needs.

- Once users fill out the form, the form submissions will automatically go into the Excel workbook or table you’ve specified. There, you can sort, filter, and organize your data, and create detailed reports from the information.


Start collecting form responses in Excel automatically
If you’re looking to automate Excel collecting responses from form submissions, you’ve got plenty of options: Use Microsoft Forms, try Excel’s form tools, or use an advanced form builder with a native integration to Excel, like Jotform. The method that’s right for you will depend on your needs — are you looking for basic data collection or a polished web form for external users?
If you’ve already built your form in Microsoft Forms, there’s no need to start from scratch. Our migration tool does all the heavy lifting for you — no need to rebuild your forms, and no risk of losing any data in transit. In a few clicks, your form will be moved over from Microsoft Forms into Jotform, giving you access to our advanced features and native integrations.
Explore Jotform today and see why it’s an excellent choice for creating web forms, integrating them with Excel, and taking data collection to a whole new level.
FAQs on populating an Excel spreadsheet with form data
To create a fillable form which will populate an Excel spreadsheet, you can use a basic form builder like Microsoft Forms or an advanced option like Jotform, which has a native integration with Excel.
To get a Microsoft form to populate an Excel spreadsheet, click View responses and then click Open results in Excel.
There are different ways to fill data from Excel to a web form. You can do it manually by copying and pasting, or use tools to automate the process, such as browser extensions, workflow automation tools, or custom scripts.
This article is for operations teams, admins, marketers, educators, HR teams, and small business owners who want to collect information through an online form and send it into an Excel spreadsheet automatically.


Send Comment: